Categories
Personal Announcements Press Releases

Entrepreneur Builds ‘Buy My Moms House’ Site to Keep Mom’s Missouri House from Foreclosure

PASADENA HILLS, Mo., Nov. 18, 2009 — A California entrepreneur has put up a Web portal called “Buy My Mom’s House” (www.BuyMyMomsHouse.com) to help sell his mom’s house in Pasadena Hills (St. Louis) Missouri, which has been on the market for a year and, while sitting idle for open houses, has been eating through mom’s savings.

According to Christopher Laird Simmons, who put up the site, “What is this Web site all about? Well, my mom is now alone since my father passed away in 2003, and since my grandma passed away 2 years ago, my mother moved to a California community called Victorville which, where she lives, is made up of retirees. She is on a fixed income, has no retirement income other than social security, and needs to sell this house to live on for the rest of her life, literally.”

The lovely 3-bedroom, 1.5 bath colonial home is close to the University of Missouri-St. Louis (UMSL), and is an ideal first family home since it qualifies for the $8,000 first time buyer credit, and a $3,000 St. Louis county buyer program. The house, at 7336 Country Club Drive, has 1,790 sq. ft. of living space, coved ceilings, home office space, large family room, formal dining, and large yard. The house has been priced for quick sale.

“Unfortunately,” says Simmons, “mom put this house on the market right before the banking/credit collapse and, like most homes out there, it’s been hard to find the right buyer even though it’s a great Colonial and brick home and family-ready. It’s been a harder sell, too, because it’s not an ‘ultra-modern’ home with the latest celebrity-endorsed stainless steel appliances.”

He adds, “My late father Dr. JL Simmons, PhD, was a visiting professor at UMSL, and hence why my parents moved here two decades ago. He wrote several books while living here, was interviewed here for radio and local St. Louis TV, and one of the non-fiction books was a ‘Book of the Month Club’ selection. My brother got his degree in Math at UMSL while living at home, here, before he moved to Washington State for an internship, and is now working in the computer industry.”

Simmons does not get any commission or any revenue from helping to promote the site. “While putting up a site to sell a home is nothing new, I thought the domain name was on the nose, ‘Buy My Moms House,’ so I registered it, put up the site, and you never know — if the right person sees the site, they might call the REALTOR(R), make an offer and there you go. Merry Christmas, Mom!”

Visit the site at: www.BuyMyMomsHouse.com .

*(PHOTO 72dpi: www.Send2Press.com/mediaboom/09-1118-BMMhouse_72dpi.jpg)
*(Caption: Screen shot of home page for BuyMyMomsHouse.com.)

NEWS SOURCE: Christopher Laird Simmons

Send2Press(R) is the originating wire service for this story, Copr. 2009.
All referenced product names, and other marks, are trademarks of their respective owners.


UPDATE OCT. 2010
Thank you for “buying my mom’s house!” Very happy to report my mom’s house finally sold, and is now “off the market,” as a new family now owns the home. The domain will start to close very soon, as the house has been sold. Thanks to everybody who helped spread the word, helped my mom in a tough economy, and congratulations to the new homeowners.
-Christopher Simmons, Oct. 22, 2010.


Categories
Articles Film and TV Reviews

Why ABC’s remake of V ‘The Visitors’ lost me at hello

REVIEW: Well. I’m pretty much the target audience for any science fiction show, having been born and raised on SF films (my parents took me to see 2001: A Space Odyssey at the Cinerama dome at age 6), and TV. I enjoyed the original “V” series with the mall hair, member’s only jackets, and moral heavy handed overtones of Visitors = nazis.

So, I was curious to see what a “re-imagining” of V might be like, since other such ventures have been hit or miss. Movie remakes of series have generally sucked (think Wild Wild West, which I loved as a kid), and it’s been rare that a remake exceeds the original work, as has been the case with Battlestar Galactica.

v the visitorsAs to the premiere of the new “V” last night? Frankly my dear, I was bored out of my mind. So many contrived elements which might have been acceptable in the “old days” of television (remember when they couldn’t show a bare bottom, or say “shit” on TV?), now seem not so quaint but just laughable. We know much more about biology, science, and the universe than we did when the original show was on.

Beyond the contrivance of the smart FBI chick’s kid just happening to become a convert of the V-meme, or the fact that it seems unlikely that lizard-people wearing bio suits would be able to live comfortably on Earth and maintain long-term relationships. Certainly, the idea of the “chameleon” comes into play, and that would have been far more interesting if the Visitors could change and shed their skin rather than wear the 1/2-inch thick rubber suits.

Is it really likely that a “visitor” (ne “invader”) would be able to pass all the x-ray, bio sniffer, and similar biometric systems in place after 9/11 in many public and other locales? Are they cold blooded? Would they show up as an empty spot on a heat sensitive security camera?

I find it unlikely that a race of horny (pun intended) lizard folk would be attracted naturally to us smooth-skinned types which goes against their general biology. I’ve never had a lizard come up and try to hump my leg, or sit on a rock in the desert and give me the googly eyes like these visitors do. And sexually compatible? Really?

I think we’ve seen so many end of the world, day the earth stood still, when worlds collide kind of films over the past sixty years that the general rule of anybody raised on pop culture would be suspect of ANYBODY showing up in a space ship. We can barely trust our neighbors, our spouses, our children, or even folks in different states of the USA. We make fun of the French for not joining in a massacre of innocents in other countries (“freedom fries”) but we’d accept a bunch of “too good to be true” aliens showing up in a bunch of space ships and not wanting anything.

And apparently TV anchors can now do their own stories without a news director overseeing the program. That didn’t work for Dan Rather, so why would this be allowed by the guy interviewing the Visitors on international TV now? Don’t buy it, sorry.

If we don’t trust our own government to run a health care plan (where’s Sarah Palin in this? if she thinks Obama is running death panels, what would she say about the visitors?), would we trust aliens who have been around for about a minute to offer a health care plan. Um, yeah, scan my DNA, you won’t sell it on the alien internet will you?

At least they got the obvious out of the way at the outset – best friend an alien, check. Tagging now means positive “V” viral marketing, check. Contrived family relationship to put mother and child at odds when the world is at stake. Aliens with misgivings about “what’s really going on” (but never bothered to tell anybody before the visitors came down in full force). Really?

Although “V” did well in the ratings, I ended up tuning out, and letting the DVR record it, and switched over to NCIS, which won the ratings that night. I watched the rest afterwards, but was still bored.

So what comes next? A whole season of watching clueless people discover everything the audience already knows? They want our resources, they like having sex with humans (might be more interesting on Showtime, but definitely not on ABC), the like to eat their mates. What is there to learn we don’t already know.

I’m not sure who the target audience is now, since it’s far less interesting than ABC’s FlashForward, not remotely as good as Battlestar Galactica, and not even as flippant and junk-food-enjoyable as Psych. Perhaps the Gen-Y who never saw the original, or perhaps people who will watch anything. Maybe it’s just me, but I expect more from my B-grade sci-fi than I used to.

They lost me at hello.

Article is Copr. © 2009 Christopher Simmons. Article originally appeared on eNewsChannels.com.

Categories
Music and Recording Reviews

Review: Open Labs NeKo XXL Gen5 DAW Keyboard Workstation

REVIEW: I’m a big fan of Open Labs’ music workstation instruments, so I was pretty excited when they announced the rebirth of their XXL model this spring, which was not available last October 2008 when I bought the NeKo TSE (previously reviewed for Music Industry Newswire). The XXL is not technically their flagship, if you ask anybody at Open Labs (OL) about that; it’s a special-purpose version of their NeKo designed for those with more professional needs. This means, specifically, it has all their control surface options (except the DJ panel), and most importantly it has faster multi-core Intel processors, more audio I/O, and hardware word clock I/O. Since the audio hardware is based on the M-Audio Delta 1010 series, it is “ready to rock” with Pro Tools 8 MA Edition, out of the box. It also comes outfitted with four 1TB hard drives (think system drive, audio drive, sample drive, back-up drive), and all the rest of their fifth generation software package.

Open Labs XXLThe first thing I found when taking it out of the box is that they still pack the unit very well with the spongy type of foam, not the brittle stuff that breaks into dust when you try to take the item out of the box; this means it absorbs shock better, and can be re-used in the future. So, it’s very well packed to arrive safe and sound, and to protect the LCD touch panel.

OL is still a bit stingy on the documentation, but I will address that in my minor quibbles a bit later on.

Ins and Outs
The short run-down of the hardware specs of the XXL are:

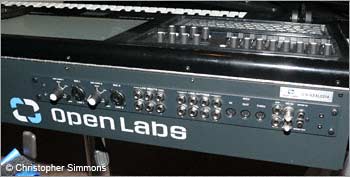
AUDIO: (1) High performance audio I/O card with low latency including 24-bit/96kHz professional 10-in/10-out: (2) mic/instrument preamp inputs (with phantom power 48V), (8) analog line inputs, (10) analog line outputs, S/PDIF digital I/O (coaxial), (1) Word Clock I/O, (1) headphone jack with volume control. MIDI in and out. Sustain and expression pedal inputs.

SYSTEM: Windows XP SP3. 2.8 GHz Core2 Quad Intel processor. 4GB RAM. One dual-layer DVD-RW (SATA) drive. Four 1TB Western Digital SE16 SATA (3GB/sec) drives. DVI video port. 15-inch touch screen. Four USB 2.0 ports (2 internal, 2 external). One FireWire 400 port. One Gigabit Ethernet port.

NeKo XXL Back Panel

Control This
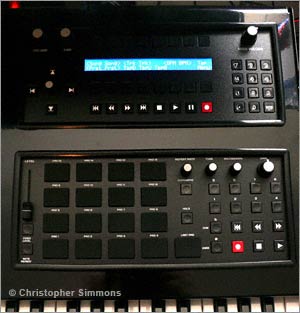
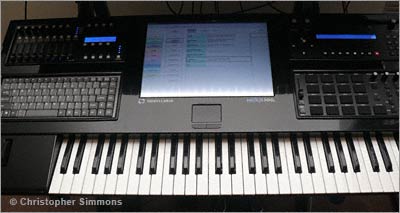
What sets the XXL apart from the other Gen5 (fifth generation) OL keyboards, is the extra panels, which means it has the new Bump MP drum panel, the mixer panel with display, a QWERTY keyboard (useful for shortcuts in most recording applications), and the new Alpha II Panel which has a wide LCD display (scribble strip, if you prefer) with assignable buttons and encoders. Missing from the XXL, but found on other Gen5 models is the DJ panel, which appears to be missing here due to lack of internal space because of extra cards and cooling.

(Note: on their Web site, they refer to the Bump MP as “Bump MP,” then “BumpMP,” then “Bump-MP,” so I’m not entirely sure which is definitive.)

It’s all a bit to take in and get a grasp on (pun intended). The one thing which threw me at first, is that the dedicated keyboard transpose buttons found on the Gen4 NeKo instruments is no longer found on the XXL (thanks to different, better panels). On the non-XXL models, the DJ panel (fader, knobs, and buttons, below the touch panel) can take over this chore. With the XXL I discovered the only way to do this is to use the Alpha II Panel (top-right panel), and use the menu key to switch to the Reaper DAW preset, and then the up/down and reset transpose buttons work from that pre-set.

Apha II Panel and Bump-MPHowever, there is no standard pre-set on the Alpha II Panel for virtual instruments, which there should be. Of course, there are presets for bundled Reaper DAW, the bundled Ableton Live 7 DAW, and Riff. (To clarify: the default transpose buttons on the Alpha II Panel work while in Riff, which is the default environment for the XXL. It’s only when you leave the Riff environment, go to Windows, and launch a stand-alone application outside of Riff, where they do not.)

Since Ableton Live is a whole subject in itself, I’m not going to cover that product at all here, but suffice it to say that the XXL’s many controls are very well mapped to the Live environment so you can do some pretty amazing things with it.

Similarly Reaper is a wonderful DAW, which has some notable features for working with everything from one screen. It’s got a little bit of a different mindset than Cakewalk or Pro Tools, but if you want to do a lot of audio recording, it’s dead easy to learn, and OL have many great tutorials and – again – all of the Gen4 and Gen5 keyboards are pre-set to control Reaper elements.

The mixer panel (top-left of XXL), has 9 faders, with four banks; and 16 knobs, as well as an LCD display where 8 of the knobs have scribble strips that change based on the presets (meaning, you can create a pre-set for Sonar, or Pro Tools, if you wish). The system is pre-set to work with both Live and Repear, and Riff. The sliders have LEDs at top and bottom which get brighter depending on the position of the fader. The faders were designed to work with the MiKo layout, apparently, as the blue LEDs are to the left of the faders, so while seated at the XXL, they are not clearly visible when the faders are either close to bottom or top.

The Big Wow
Probably the most exciting thing to me about the XXL, personally, is that it is the first true (no B.S.) “all in one” recording product ever built, by anybody, period. Full stop. Right now, I can boot up the unit in under 100 seconds, and be running either Pro Tools LE (M-Audio edition), Cakewalk Sonar Producer Edition, any virtual instrument in stand-alone mode and – finally – Gigastudio. One of my (perhaps silly) dreams for many years was “Oh, I wish Tascam would build a keyboard instrument to run Gigastudio in standalone mode… just like my Triton Pro Extreme or Kurzweil. Sigh.” Well, folks, now I can. And, may I say, big freakin’ wow, baby. The OL XXL has GSIF2 drivers, so I can load up a whole passel of Giga sounds, and the updated GS4 interface actually works on the 15-inch touch panel.

(Ahem: of course, Gigastudio is now a defunct product, but those of us long-time users still like it. And, although I have also become a convert to Native Instruments’ Kontakt 3.5, it would take a year or more of my little free time to convert my vast legal sound libraries, and I’d lose many of my key-switching capabilities.)

With the touch panel, I really love virtual instruments with stand-alone modes, like the Arturia CS-80, where the on-screen ribbon controller responds to the touch panel! Some virtual keyboards, like Native Instruments’ Akoustic Piano, is made for a touch panel, since you can just tap the piano you want to load, and then the environment to play in. Very cool. Manipulating samples and elements in NI’s KORE 2 system is equally elegant by touch.

Rock and Riff
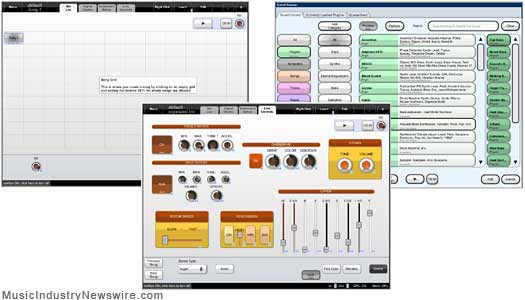
When launched, the XXL opens into the Riff environment, which is OL’s own custom live workspace environment. This is very cool, and shows that OL has really matured from repurposing other folks’ applications (like Karsyn, based on Forte) to building their own solutions. At first glance, it seems to be a fairly simple grid setup to create custom song-sets, each of which can contain instruments, FX, and routings. At second glance, it’s clear a lot of thought has gone into Riff in making it a very deep system for playing live, and for creating your own custom “instrument” for when you boot up the XXL.

For example, you can create custom buttons, dials, sliders and other controls to manage individual instruments, or groups, which can vary per song. Riff is perhaps the most powerful thing about all of the fifth generation OL instruments (Gen4 gear can be upgraded to the Gen5 software), and might be easily dismissed when jumping right to an installed DAW. It’s a little confusing in some ways relative to the prior starting point of Karsyn, as found on Gen4 OL products, but once you play with it a bit (or use the live training support option included), it really starts to get under your skin of how cool it really is.

Open Labs Riff 1.2

As one example, you could create a song grid, with all your songs by name and color code on the touch panel, and you could group different buttons around a core song. So, in the context of a single performance you could easily jump between groups of instruments, splits, effects chains, patches, mixes and so forth with one button. Further, you can create custom controls for each set-up, like on screen toggles, sliders, dials and whatnot, so if you want to just control the filter on your bass line, you can do it by adding just the single element you want to see/control on your screen. I didn’t see a couple of things on first or second glance, but I’m hoping they add a joystick type x-y controller and side-to-side virtual ribbon controller type element, as these are superb control surface options for virtual instruments.

Initially I found the default set-ups a little disappointing relative to Karsyn on the TSE, because very few of the bundled instruments showed up in the drop-down menus for Riff; for example, Truepianos is included, but didn’t show up in the menu for “keyboards.” So, there are no default Riff set-ups with Truepianos. After I had installed Native Instruments Komplete 5, I went into the “add” menu, and found I could drag any of the installed instruments into the categories, or make new categories. Now my “keyboards” drop-down menu has Truepianos, and the Native Instrument keyboards and B4. Now if I want to make a new song setup, they are right there.

Because this is still fairly new (version 1.2 of Riff literally came out days before my unit shipped, and the tutorial videos on YouTube still show the earlier version), OL hasn’t yet had time to build out the amazing instrument set-ups that came with the TSE workstations. So, most of the set-ups are built around just a very few of the bundled on-board instruments and sounds, and you can no longer launch them from the OL GUI, where previously the GUI would launch special set-ups of Karsyn and E-MU’s Proteus X2.

Luckily Karsyn is still included (for now), which is still kind of easier to use for just launching a newly installed VST, since it has a nice menu of “newly installed instruments.” So, you don’t need to make a song, or edit one, you just click load, and it’s playable. OL will be discontinuing Karsyn at some point in favor of Riff, but for the transition, it’s nice to have. In speaking to one of the OL support folk, it sounds like there are some really wicked things planned for Riff, and for a nascent application it has some truly inventive ideas.

Open Labs NeKo Front

Sounds on Board
On the subject of sounds on board, I was more than a little surprised to no longer find any version of E-MU Proteus X2, even the free Proteus VX. I’m not sure if OL had a falling out with E-MU, or perhaps E-MU chose to discontinue licensing the X2 software now that X3 has come out. Luckily, I already owned a legal copy of Emulator X2, and upgraded to X3 which doesn’t require a dongle anymore, so with X3 loaded and all the libraries I had purchased for X2 (classic keyboards), I now have the same sound sets from the TSE, minus the Ensoniq ASR-10 sets. For anybody migrating as I am from the TSE to the XXL, you will want to go buy the Proteus or Emulator X3 from EMU, or at least download the free Proteus VX, so you won’t be going “hey, what happened to….”

OL does include several E-MU sound sets from Digital Sound Factory that work with the included Cakewalk Dimension LE, which are sounds from the venerable E-MU Proteus 2000, MoPhat and Virtuoso modules. However, these are fairly old school in quality (small number of samples per patch) versus today’s modern ROMplers or the some of E-MU’s extensively sampled vintage keyboard libraries.

Basically, Cakewalk’s Dimension LE is the new “standard” library playback engine on the OL Gen5 instruments, replacing E-MU’s Proteus X2. This, actually, is not a bad choice, since Dimension uses the same sfz format as Wusikstation (also included with OL products, as before), and the OL MimiK key cloning application. However, you will want to upgrade to the “Pro” version ($99-$149, depending on Cakewalk’s variable pricing on their instruments) for any key cloning efforts (cloning hardware or virtual synths), since Dimension LE doesn’t have all of the ADSR and editing tools needed to properly replicate many of the instruments you may wish to clone. Of course, if you are using Cakewalk Sonar, you may already have the Pro version.

Other bundled sounds/instruments include Lennar Digital Sylenth, which is one of the better analog sounding virtual instruments, and is ideal for those who want a wide range of arpeggiated patches (hint: try stopping the arpeggiator on the more interesting patches to just play them normally). Purity and Autogun are included along with the aforementioned 4Front Truepianos.

Boom Shaka Boom Boom
One of the very cool things in the sound department is the custom collaboration between OL and FXpansion, for a customized version of Guru, the drum machine slash drum sequencer. With the combination of the new OL “Bump MP” control surface and Guru, you have a very usable setup for those who may have grown up with a venerable Akai MPC. But, wait, there’s more!

One of the truly cool things about the Bump MP set-up, is that OL have added one unique thing to the otherwise standard 4×4 (16) drum pad layout, which is a “last played” button (a 17th pad). This lets you instantly play something like a hi-hat using two buttons, as the extra pad does whatever your last pad did. As someone who was first on the block with a Linn9000 back in the day (my band-mate at the time, wrote the manual for the Linn9000), and have owned several MPCs (I have a MPC3000 and MPC4000 now), this is really useful and works.

Guru is a great choice as it works either in a MPC style of recording, or closer to an Ableton Live (more about that in a minute) mode. If you haven’t used Guru before, it’s a bit like how you have multiple pad banks on the MPC, but think multiple virtual MPCs which in turn have their own multiple banks. It’s a little confusing at first, but like most things, once you get it, you go “ooooh!”

To quote OL’s promotional materials: key features of the Bump MP include: (16 plus 1) fully assignable pads, note repeat, fixed level fader, transport controls, chromatic mode, hold, pad tune, multiple groove preset and eight engines with 24 patterns per engine. This also allows up to 512 step sequences per pattern.

Minor Quibbles
Open Labs are still a little stingy on printed documentation supplied with their products, which amounts to an 11×17 getting started color sheet, a support sheet, a contact sheet, and an upgrade card for the bundled Live software. A couple of the numbers and arrows for the back panel are wrong on the getting started sheet, for the MIDI jacks and the expression pedal, but those are self evident when looking at the back of the unit. If we’re going to be forced to print out our own manual, it wouldn’t be a bad thing to perhaps include a 3-ring binder with the Open Labs logo printed on it, and then put the videos onto a proper DVD disc, and quick start sheets for ALL the bundled Open Labs applications like Riff and MimiK. I’m sure I’m not the only one that thinks it’s ridiculous to assume we’re going to keep flipping between a PDF and the Riff environment on a 15-inch LCD to learn to use the thing.

Of course, to mitigate this (in my opinion) lacking, the NeKo XXL comes with Open Labs’ “Platinum” support, which includes hands-on training of Riff and MimiK, in lieu of the documentation, so this really can be considered a premium replacement for old-fashioned how-to printed materials. I do like to point out that even Roland has returned to providing printed docs, which they tried to get away from, as with the launch of the V-Synth GT, which had limited printed docs, and a getting started sheet that looked like something from a 1980s VCR set-up guide. With the Fantom G series they brought back a proper manual, quick start guide, and jump start sheet, to which I said hip-hip hooray when I took the Fantom G6 out of its box. I’ll keep mentioning this in every review I do for products with no manuals, as it doesn’t save trees for me to have to print out the sheets from the manual, when they should come with any music gear that costs over $2,000.

But again, OL do provide arguably the best live support option in the industry where they will schedule a time to walk you through the set-up, customization, and use of the apps that come on the XXL; for their core customer base, this is a better option than printed materials, except for us dinosaur music types who still like to read docs for stuff while watching TV to separate the brain activities. But I digress. The live support is exceptional, and is worth about $600 if taken alone. And in the first couple of months, you can upgrade to extend that support.

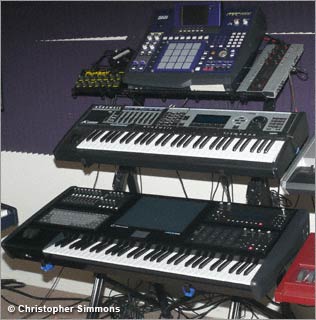
I found once I put the XXL on the Standastic stand, where my NeKo TSE had been (see photos), was that the piano black finish actually works pretty well with the black rubber surrounds with the different panels, making them look more integrated than the white finish of the TSE models. On the other hand, I was a bit surprised to see what looked like minor resin snail trails below the clear coat finish, in the area right below the pitch/mod wheels. You can’t see this unless it’s hit with a ray of sunlight, or with a flashlight, but it does, unfortunately, still reveal the fact this is a bespoke product and not a mass produced workstation from the “big boys” in Japan or Europe. So, a little surprised that a $6,800 instrument has a paint finish a little closer to Earl Scheib than Chip Foose; but only a detail nut like me will likely even notice it. Not a deal breaker, and the free 28-inch LCD display they included as part of their summer promotion, sure didn’t hurt.

While OL does not provide install disks or recovery disks for any of the bundled system OS or applications, a very usable copy of Acronis OEM edition is included, which lets you create full working back-ups of your set-up, and put those back-ups on your hard drive (or external media). It’s a good idea to do this before you start to install anything. Then when you have the first batch of things installed do separate back-up of that. And then, when you have everything installed, do a separate back-up there. Do, a second back-up of everything, and then you can do “incremental” back-ups to that “working” back up image. Thankfully, that fourth 1TB drive is ideal for this practice.

Finally, the smallest of quibbles: I’ve noticed a bit of lack of attention to detail in various Open Labs materials this year, which was not the case last year, such as the mis-labeled items on the welcome sheet with the XXL. Throughout the OL Web site, they refer to the Acronis back-up software as Acronus, sequencer is mis-spelled often, the Bump MP panel can be called Bump MP, Bump-MP, and BumpMP (um, which is it?); MIDI is often called Midi, etc. When I went to register the DBeat hardware product, there was no option for that product on their registration page. Finally, when I got the XXL, the included upgrade postcard had a link to the Ableton site which did not exist; I had to point this out to support, and then the Ableton site was updated a couple of days later (didn’t anybody check that – the card had to be printed before being sent to customers?).

So, somebody in marketing or management hasn’t been keeping track of the team as best they could, which has not (thankfully) affected the products, but it does show some cracks in the plaster from their growing pains, which I hope will be better addressed moving forward.

Real People Real Support
One of the best aspects of any OL instrument purchase, perhaps, is the support. You can actually work with a live person to show you what to do, explain how to solve a problem specific to your work-flow, and train you on the features built-in to the OL products. Saturday appointments are available, too. In some parts of the country, you can even have a guru come to you on-site. This is rare in the music industry outside of the professional studio services trade (e.g., the folks who install your $100,000 mixing console).

All OL products are pre-set with optional dial-in support, meaning if you have an Internet connection, you can have a tech access your machine remotely to tweak something.

Wrap Up
Overall, this is one of the coolest pieces of electronic music gear I have purchased brand new since that day I walked out of Guitar Center with my Sequential Circuits Pro One oh so many years ago. The more I use it, the more I discover I can do, and beyond the geek-factor, I do find myself being inspired again to actually make music rather than admire the technical facility or possibilities of “what it’s possible to do,” which is the bane of many virtual instrument collectors.

With the mix panel, you can tab between banks of faders, with the Bump MP panel you can play drums more elegantly than keyboard, and I don’t have to stand-up to wham on my MPC. The built-in DAWs give you choices “out of the box” as to how to record music, and since it’s a Windows XP computer under the hood, you can literally run any application that runs on a standard PC.

FIVE STARSCertainly, it’s not inexpensive, but it’s far more than a keyboard, a PC, some drivers, and a touch panel bolted into a custom case, which is the mis-conception of the “laptops or die” crowd. If you look inside there are numerous custom circuit boards, intelligent engineering in the layout for cooling, it’s quieter than you expect, even with the fans at full speed (I chose to use the NeKo on a 100-degree day in mid August, with 70 percent humidity, and only one fan on in the corner in my home studio, and the XXL got warm, but I was fading from the heat before it was).

If you want to replace a wall of hardware with something more elegant, and if you want to retire all the wires between your notebook, audio interface, keyboard controller, etc. with one “all in one box,” look no further than an Open Labs MiKo or NeKo. With the XXL, you have one system that can run all the best Windows-based DAWS with no additional hardware, and the Riff and Bump MP solutions are true value-adds that are remarkable on their own.

To loosely quote Ferris Bueller, “If you have the means, I highly recommend it.”

Summary:
Music Industry Newswire rating: FIVE STARS.

Open Labs NeKo XXL: SRP(US) $6,899. Dimensions: 46″ (W) X 20″ (D) X 7″ (H), Weight (base configuration) 46 lbs.

More information: http://openlabs.com/nekoxxl-overview.html

Download manual: http://openlabs.com/downloads.html

PROS: Exceptional do-it-all platform with flexible audio I/O based on mature M-Audio Delta hardware. Compatible with all Windows-based applications, including Pro Tools LE (M-Audio Edition) without any other hardware. Great bundle of applications and sound tools to get started. Superb tech support (Platinum level) included which comprises training on the hardware and software. Forever upgradeable as new hardware and software is released (as long as company is in business, of course). Many Gen3 product owners upgraded to Gen4 software. Even my Gen4 TSE can be upgraded to add the Bump MP module for about $700, with all the software (check the sales dept. for “today’s price”).

CONS: Missing some of the wonderful sound sets of prior editions, including the extra Wusikstation expansion packs and E-MU premium sample libraries of the TSE series. No printed manual or user guide other than quick start sheet. (PDF manuals and tutorials are on hard drive, Web site, YouTube, etc.)

Article and images Copr. © 2009 by Christopher Simmons, all rights reserved. Article originally appeared on MusicIndustryNewswire.com.

Categories
Advertising and Marketing Articles Business 2.0

The Verdana Monologues – When Ikea’s Designers go Kabookskik

ARTICLE: I got my Ikea catalog last week, and like many in the design field, thought something had changed but wasn’t quite sure what. Due to the fact I have been working on the Web more than the printed design space the past five years, it actually took me a little bit to notice the fonts had changed throughout. About the same time, this past Thursday I started to see a whole raft of online articles, blogs and business media responding to the “uproar” about the change: Ikea had changed their typeface. Holy Crap!

AIN0809-Ikea-VerdanaNow, while this falls about as low as one can get down the pole of what matters in the world right now, below unemployment, health care, and so forth, it’s nevertheless become a rallying cry, or topic du jour for the design community who despair over things as minute as the space between headline letters (ahem, I do that, too, admittedly; it’s called “kerning”), that Ikea has switched from a rich custom type font, to the lowest common denominator, a type face created for the Internet by Microsoft, called Verdana. A style of type which was not designed for print where the lovely bits interact with ink and paper, but for the cold cathode ray tube (CRT), and other display technologies which have evolved into LCD, OLED, plasma, and e-ink.

The main upset seems to stem from the fact that Ikea has “always been known for design.” And this is true, to an extent. Ikea has always had a mix of super cheap pressed board crap clothed in lovely colors and silly Sweden-inspired names with a healthy dose of umlauts, very cool desk accessories, storage stuff, and some often inspired decor pieces, as well as some lovely high-end “real wood” furniture pieces. I know, my curved desk I’m working on now, my bedroom furniture, my living room wall unit, and book cases all came from Ikea during the ’90s. I’ve been a graphic designer since my teenage years (ahem, the late ’70s/early ’80s), and I always “dug” the stuff at Ikea because it was both affordable, but some was really cool, too. Plummers was here first, and I tend to like their stuff better now, but Ikea really was a fun place to walk through and look at the mix of whacky desk lamps, and grid design flat-packed furniture.

So, this issue with Verdana … well, the problem stems (sort of a pun there for you typographers) from the fact that it doesn’t look as good when printed large as a headline, compared to a font which has been “drawn” to look good at large sizes, letter space (kerning) is harder to control, and because it’s a wide, open style, whereas many headline styles are designed to have thinner curves, and narrower widths to fit better in page layouts. Verdana just wasn’t built for the world of magazines and newspapers. All you really need to do is look at any price that has a 1 in it, like a large $129 price. The horizontal space, or white space between the 1 and 2 is too much, and creates an unpleasant empty space, even when kerned close together. Yeah, it’s true. But, really, so what. Verdana works because it’s big, blocky and seems to be missing subtle curves in places, and sometimes looks like it’s bold, even when it’s not. But you can read it at a distance, up close, and it shouts its readability. Not as pretty as the old font, admittedly.

But really, is that a bad thing? I am very knowledgeable about type, having gone to Compugraphic Typesetting School in 1984, and I also got my start in design with blue pencils, and dry-transfer lettering which went onto art boards by hand. I had my own typesetting business in 1987, and I started doing Web design in 1994. Verdana was a popular font once it was introduced because it looked great at font size 1 in HTML, whereas Times and Arial/Helvetica did not. Before CSS, it was common practice to use Verdana for footers, captions, small type, superscripts, and navigation. And for text on, ironically, many of the design oriented Web sites that wanted to use something other than Times or Helvetica.

Yes, Verdana is a font introduced by Microsoft, and was often eschewed by the Mac oriented design community simply because of that, and it being a “Web font,” not designed for print. Funny thing, too, is that the Mac version of another Microsoft font, Georgia, really does look gorgeous on the Mac, and has many of the traditional type elements, where the Windows version is more blocky. I ran into this when I chose to use Georgia for our company logo in 2000, but when we switched to Windows XP in 2006, the font didn’t look the same when you viewed it at 400%, or printed it at headline sizes like 72 pt. I haven’t looked at Verdana on the Mac lately vs. on Windows, but wouldn’t be surprised if there is a slight difference there as well. I chose Georgia for our company for the exact same reason Ikea chose Verdana, it’s a cross-platform, multi-language, multi-format type face – meaning, you can use it for print, for Web, for PDF, for video, and you can have a consistency. And, it does look very clean and open when translated to other languages; Microsoft did a great job at that.

Verdana spec sheet

Now it turns out Ikea is on the defensive because designers claim they have been violated, betrayed, and that Ikea should go back to its original corporate fonts. There is even a petition circulating to tell Ikea to go back to its original style.

In my opinion, that’s a mistake. Frankly, Ikea is acting in a designer frame of mind, they have chosen to go their own way and embrace a standardized font which everybody recognizes. What many of the dinosaur design community is missing is that many of Ikea’s core audience, the folks getting their first apartments, their dorm room furnishings, first couple living together, etc., are now folks who grew up with the Internet. Many of the young adults buying their first EXPEDIT, JAVNAKER, or KVART, have more experience reading their iMac screen, and MySpace page than they do reading the New York Times or Newsweek.

Frankly, Verdana “communicates” very well with youth culture because it’s the typeface of their generation, not their great grandparents. Sure, Futura or Optima, or any of the lovely Adobe or ITC fonts give us a rich history of details in the hand-making of letter styles, but for advertising, marketing and the sale of goods and services, this was a calculated and intelligent design choice.

It’s a business, not a design contest. In a worldwide depressed economy, anything a company can do to standardize, and become more efficient should be applauded and not derided. Of course, most designers work for somebody else and don’t have to deal with the business issues. Very few are both left brain and right brain enough to understand why Ikea has chosen to do this. The negative publicity the design community has drawn out regarding this change has, in fact, proven the point that Ikea’s designers made the right choice. End of days? Not quite.

Isn’t it a designer’s prerogative to buck conventions and question the standard way of doing something, and choose not to do what is expected? What’s wrong with choosing to use the “wrong” thing, to make the right choice for a brand style? Kudos Ikea team, you make me proud for proving you do have what it takes to be a mover in the world of design.

Article is Copr. © 2009 by Christopher Simmons – all rights reserved. Story originally appeared on AdvertisingIndustryNewswire.com.

Categories
Personal Announcements Press Releases

New Art Book Combines Chaos, God and Sex with Digital Imaging: ‘Fractopia’ by Christopher Simmons

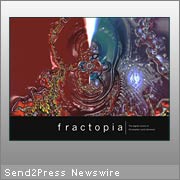
REDONDO BEACH, Calif., July 2, 2009 — Christopher Simmons’ “Fractopia” (ISBN: 978-0-9710555-0-6, hardcover – limited edition, Neotrope Press), collects the best of Simmons’ abstract images created by combining fractal imagery with photographic effects, textures and hand-applied layers. This special edition includes a video DVD with slide show of all images found in the book. Some of the art has been called sexual in nature, including the piece called “godheart.”

“When these images appeared in art installations more than a decade ago, many thought I was intentionally trying to create impressions of the female womb with at least two of the illustrations,” said Simmons. “This was not the goal; but the first such piece called ‘godheart’ does appear similar to a womb, but also an all-seeing eye, with both electric and metallic textures. This impression led me to the name of the piece. A later piece, ‘spiralasm,’ does convey an intentional sense of the organic and the orgasmic.”

Simmons’ “Fractopia” series images have been featured in such venues as the “Bytes of Art” gallery shows that were hosted throughout San Francisco in 1997; the Cosmic Cafe online art gallery in 1996-7; and the first image in the series, ‘balls in sandtrap,’ was used as the full color cover for the 1997 California State University Long Beach (CSULB) Science and Technology course catalog.

“My favorite images are actually first, ‘fireonice,’ which to me seemed to imply a ghostly figure caught between the realm of fire and energy, and the extreme cold that can freeze thought and movement. This image is used for the book cover. I also used this image for the cover of my 2000 music CD release ‘Beserker.’ And my second favorite is called ‘prayer bubble,’ which appears to be two hands moving through water, filled with fractal bubbles, holding a sphere. This was loosely inspired by my wedding photos showing hands touching, which is why it was dedicated to my then spouse, Paula.”

Christopher Laird Simmons is an award-winning graphic designer, photographer, musician, and digital imaging professional. He has created original images for national magazine covers, product packaging, and managed diverse brand identity projects for more than 25 years. His first computer-based artwork was done for the Adventure International game “Stone of Sisyphus” in 1983, programmed by his younger brother, David.

Simmons is also a respected marketing guru and technologist, who has been interviewed by publications as diverse as Entrepreneur, PC World, Chicago Post-Tribune, and TrendWatch; and is one of the experts quoted in the book “Career and Corporate Cool” by Rachel C. Weingarten. He is the CEO of Neotrope(R), and is a member of PRSA, and ASCAP.

“I created these images in a creative rush during the mid nineties,” added Simmons, “and Adobe Photoshop was my palette for these visions, along with filters from Kai Krause and John Knoll. I tried to take the chaos theory behind fractal imagery then combine that with deep colors and organic sensibilities to create something unique; finding and massaging shapes and patterns within the fractal elements and color gradients.”

FRACTOPIA™, the limited edition, ISBN-13: 978-0-9710555-0-6, is published in hardcover with slip cover; full color throughout, with video DVD. Size is approximately 9×11.5 inches. Price is $39.95 plus shipping.

More information: www.NeotropePress.com or www.FractopiaBook.com .

Neotrope® is a trademark and service mark, registered in the U.S. and other countries. Fractopia™ has been used as the title for this art series since 1994 and has no relationship with any other brand, product, or service with a similar name. All other trademarks and service marks are the property of the respective parties.

Categories
Personal Announcements Press Releases

Neotrope Press Announces Publication of ‘Fractopia’ Art Book by Christopher Simmons

REDONDO BEACH, Calif., May 28, 2009 — Neotrope® Press announced today the publication of the limited edition of “Fractopia” (ISBN: 978-0-9710555-0-6, hardcover), by digital artist Christopher Laird Simmons. The book collects the best of Simmons’ abstract images created by combining fractal imagery with photographic effects, textures and hand-applied layers. This special edition includes a video DVD with slide show of all images found in the book.

Simmons’ “Fractopia” series images have been featured in such venues as the “Bytes of Art” gallery shows that were hosted throughout San Francisco in 1997; the Cosmic Cafe online art gallery in 1996-7; and the first image in the series was used as the full color cover for the 1997 California State University Long Beach (CSULB) Science and Technology course catalog.

“I’m very proud to finally see these images in book form,” said Simmons. “The DVD also provides a more accurate look at how I envisioned the colors, which look very different on a computer monitor than on the printed page. Some of the blues, metallic colors, and reds are far more ‘electric’ in video form.”

Christopher Simmons is an award-winning graphic designer, photographer, musician, and digital imaging professional. He has created original images for national magazine covers, product packaging, and managed diverse brand identity projects for more than 25 years. His first computer-based artwork was done for the Adventure International game “Stone of Sisyphus” in 1983.

Simmons is also a respected marketing guru and technologist, who has been interviewed by publications as diverse as Entrepreneur, PC World, Chicago Post-Tribune, and TrendWatch; and is one of the experts quoted in the book “Career and Corporate Cool” by Rachel C. Weingarten. He is the CEO of Neotrope, and is a member of PRSA, and ASCAP.

“I created these images in a creative rush during the mid nineties,” added Simmons, “and Photoshop was my palette for these visions. I tried to take the chaos theory behind fractal imagery then combine that with deep colors and organic sensibilities to create something unique.”

FRACTOPIA, the limited edition, ISBN-13: 978-0-9710555-0-6, is published in hardcover with slip cover; full color throughout, with video DVD. Size is approximately 9×11.5 inches. Price is $39.95 plus shipping.

More information: www.NeotropePress.com or www.FractopiaBook.com.

Neotrope® is a trademark and service mark, registered in the U.S. and other countries. All other trademarks and service marks are the property of the respective parties.

VIDEO:

Categories
Music and Recording Reviews

Review: Open Labs NeKo TSE Keyboard Workstation

REVIEW: The concept of the so-called workstation keyboard is certainly not new; with a wide range of current such products on the market from big guns like Korg, Roland and Yamaha, stretching back in time to the Korg M-1. These products seek to fill the needs of the “one keyboard does all” set-up, for composing, comping, or touring, and may include ROMpler sound sets, virtual analog, drum sounds, on board sampling, multi-track MIDI sequencing, built-in FX; and more often these days, some level of audio recording capability.

The Timbaland Special Edition NeKo from Open Labs is a truly unique instrument, part keyboard, part PC DAW, part virtual instrument player, part DJ performance control station. It is perhaps, the ultimate expression of the workstation concept, because it finally brings together all the elements needed to play, compose, record and produce modern music; and with the advent of more affordable and more powerful computer parts, the NeKo TSE is one of the most powerful keyboards of any kind ever built.
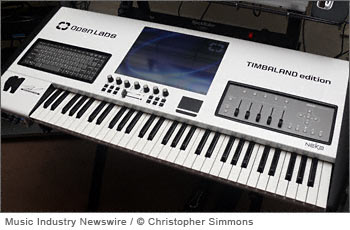
Open Labs NeKo TSEI’ve been using MIDI gear since it was invented, and this is perhaps the coolest thing since sliced bread, or perhaps since electronic music instruments began talking to each other and learning to do more than make noises all alone. But is it right for you? What other options are out there? Does it work as advertised? Well, as a recent new owner of one of these bad boys, let me tell you the tale of a fateful trip into the land of buying and using such beasts as these.

The Back Story
Into this arena of “workstation” products, a few years back, came a bunch of folks out of Austin Texas who had the idea to take this multi-purpose keyboard idea a step further, or perhaps reinvent the category, and combine the idea of a workstation keyboard with a PC; then put it all together as a value-add product. These folks, headed by founder Victor Wong, called themselves Open Labs, and their initial products were pricey and yet innovative. Some “got it” right away, and Open Labs has developed a core following over the past few years, in much the same way products like the Muse Receptor have their adherents and detractors.

The initial products included the Open Labs MiKo and NeKo; with the MiKo being a 37-key iteration, and the NeKo being a 61-key (or larger) iteration. These workstations included a quality key action (from Fatar, using the same wonderfully playable actions found in the Kurzweil line), control surface for mixing or controlling ADSR in plug-ins, PC keyboard for data entry, a touch-sensitive 15-inch LCD screen (touch panel), and custom plug-in navigation controls. The “open” part of the equation came in when they chose to use open source and “affordable” applications that run under Windows XP, for sequencing, recording, and virtual instruments.

They cleverly took Windows, put a custom “shell” GUI (graphical user interface) on top of that, and made easy to use “kiosk style” on-screen buttons to get to the most used functions a finger touch away. So, inside the “keyboard” was not the typical circuit board with custom chips and I/O from a music instrument manufacturer, but your everyday hand built AMD or Intel PC motherboard, memory, hard drive, video, and a high quality off-the-shelf audio and MIDI interface with multiple I/O and headphone support.

The whole really was much more than the sum of its parts. Arguably the one downside was the high cost of computer parts at the time. Today, 4GB of high quality RAM is the same cost as 1GB of second-tier memory three years ago, and a multi-core Intel CPU is the same price as what a single core processor once cost; more CPU power means you can run that big reverb along side your dozen virtual instruments all while recording live vocals, and not having it crash. This also includes cost of motherboard, hard drive storage, and the rest. Because of the cost of using high quality parts, and building everything by hand, an Open Labs product could easily run in the $8K range, which put it up there with products like Korg’s OASYS workstation and, well, there really wasn’t anything else like the NeKo or MiKo.

Thanks to the fact they were on to something, a lot of musicians doing good (read: successful) could afford to buy something like this; because they saw the value in the final product and that it did, indeed, fit a need that many recording artists, particularly keyboard players, could “grok.” Artists like Keith Emerson, Sheila E, Dave Cohen, Lil Jon, Jesse Carmichael (of Maroon 5), Karl “Charlie” Steinberg (father of Cubase software), and producer Timbaland (among many others, see: http://openlabs.com/artists.html) all use Open Labs products.

I always thought the product was a good idea, but had been turned off by the high price and the hands-on understanding of the downside to having an overheating Pentium or AMD PC inside a keyboard; I don’t have air conditioning and actually melted a DAW workstation due to the “run hot” properties of the then state of the art Intel Pentium IV. Ironically, I ended up buying a Korg OASYS 88, which I actually hated and sold less than 6 months later.

Enter the NeKo Timbaland Edition
When Open Labs announced the new version of their product, developed with producer Timbaland, I had just kicked the OASYS out of my studio (I was so disappointed with the OASYS, I could write a treatise on it, but will spare you), and so was sensitized to this new version. I put in an order for the 61-key NeKo after sending off some techie questions to Open Labs (who responded quickly and coherently), and had to wait about 10 days as there was already a waiting list.
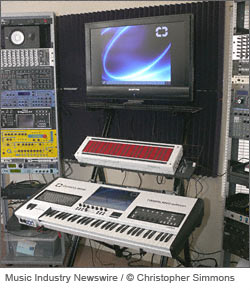
Christopher Simmons NEOTROPE Records Studio Fall 2008Whether you know who Timbaland (timbalandmusic.com) is or not, it’s useful to know that what he brought to the table in working with Open Labs was the desire for a more streamlined keyboard case decked out in shiny all-white livery, a DJ fader and quick access knobs below the screen, and a special software package that includes the full complement of sounds from the popular Ensoniq (E-MU) ASR-10 keyboard and ASRx beat box/sampler, the EPS (son of the Mirage) and ZR/MR keyboards. Any fan of the defunct Ensoniq products will really enjoy this sound library (more on software, below). This new design makes it more attractive on-stage, but also a little less cluttered from the perspective of a keyboard player. You do lose some of the knobs and sliders, which might not suit a recording studio set-up as well, but considering it’s now about $3,000 less and about twice as powerful, I think it’s a very smart trade-off for most people.

The specs on the new workstation, often called the “TSE” edition, include 2.4GHz Intel Core2Quad (runs cooler than prior generation Core2 or Pentium processors), 4GB RAM, Dual Layer DVD burner, 15-inch touch panel, second video out, 1TB of storage (500MB system, 500MB audio SATA II drives), audio and MIDI I/O via PreSonus FireBox with front and back panel I/O and 24/96 support, sustain and expression pedal inputs, 2 USB ports, 1 FireWire 400 port, and a Gigabit Ethernet port. The whole shebang comes in at about 46 lbs.

Custom Workstation Software
Much like the Muse Receptor, the NeKo TSE has a lot of open-source (or “free”) software on board, but more importantly it has a lot of licensed and rebranded/tweaked software brought together for a seamless “sit down and play” experience. You really could live with nothing more than this one system and the vast bundle of usable sounds and virtual instruments for the majority of gigging, song writing, and recording tasks. Really.

Perhaps most notable is a rebranded version of Brainspawn’s Forte VST synth rack ($129 from publisher), called Open Labs Karsyn in this implementation. Not just a product with a new logo and skin, this version has a wealth of pre-sets based on the shipped software bundle to let you quickly jump to a category from the touch panel, like “acoustic piano” or “horns.” A lot of work has gone into these set-ups, and it really makes this a keyboard you can sit down and play as easily as a Korg Triton. Turn it on, press a button, make music.

For sequencing and recording, Open Labs has similarly outfitted the TSE with a customized version of the popular Cockos Reaper ($225 from publisher) multitrack audio and MIDI recording application. This suite has a 64-bit audio engine, built-in effects, no track limit, support for both VST and DX plug-ins, and can even support network FX processing to use unused processor cycles on a spare PC you may have on your network. This is no cut-rate freebie recording system, and puts anything found on normal keyboard workstations to shame; and gives more expensive DAW software a run for their money. Of course, you can run any Windows application on the NeKo, whether you prefer Pro Tools, Cubase, Sonar, or whatever. Again, Open Labs didn’t stop at just putting the application in the menu, they went in and set-up some really useful templates, including a quick-start template for hook-up to an Akai MPC.

For those who need to capture their vintage gear and bring that one sound from their Prophet 5, or Matrix 12 on tour, the Open Labs Mimik application provides an easy to use sample and go option. While they don’t say so, it looks to be the same application included with the E-MU EmulatorX2 software sampler, where it’s called SynthSwipe EX2 Automated Sampling. Since the TSE includes the E-MU Proteus X2 instrument, this would make sense. I’ve not used Mimik yet, but have used the E-MU version previously, and it really is easy to use and does work as advertised.

Additionally, the TSE has an application called Open Labs mFusion which is a master controller set-up and management control panel. This is where you can change the DJ slider to send breath controller MIDI data, or assign the faders and buttons as needed.

Sounds and More Sounds
While you may think that Open Labs has simply taken a bunch of free VST instruments off the web, dumped them into a synth rack application, and then called it a day, you would be so far wrong I would need to scold you for your misassumptions.

In addition to the fairly large library of classic Ensoniq sounds, which you can’t get anywhere else on a new keyboard instrument, the TSE includes E-MU’s Proteus X2 instrument, which is basically the Emulator X2 without the sampling capability. However, with Mimik, you can auto-sample hardware and virtual instruments, and this is what the majority of folks actually use sampling for these days outside of professional sound design. Good choices on both counts. Not content with the bundled sounds of the stock Proteus X2 instrument, Open Labs has licensed the majority of the huge archival E-MU library, which alone is worth hundreds of dollars (ahem, I know: I bought them previously to use with Emulator X2).

So, this means you’re getting the E-MU Vintage X bundle of classic synths and keyboards: samples of vintage gear like ARP, Moog, Roland Jupiter 8 and JX8P, Sequential Circuit Prophet 10 and 600, Mellotron, Oberheim OB, B-3 organ, Rhodes and Clavinet, and way more than I plan to list here. And they all sound really good. But, wait, there’s more! For fans of the classic ROMpler rack mount boxes, the TSE comes with the Proteus 2000 (all 1,024 presets of the rack mount box) and Mo Phatt module sounds.

Bundled virtual instruments include 4Front Truepianos (Diamond and Emerald), WusikStation V4 with added libraries (hybrid vector and wavesequencer, sampler instrument), Lennar Digital Sylenth (quite nice virtual analog synth), and Luxonix Purity (I’d likely call this akin to a Korg Triton in software).

Other useful things include Disco DSP Discovery OL edition, Vertigo, Crystal, UltraSonique, Cubix; and more than 40 other goodies to go sonic exploring with. It’s really easy to stack some of the one trick ponies in Karsyn to make entirely new instruments, too.

So, all told it really would cost you a bundle (at least $1,000) to go out and buy all the bundled software included in the box.

Out of Box Experience
I had a little bit of hesitation in choosing to buy the NeKo TSE, since on paper it looked really really good, but dropping nearly $5K on anything these days can be a real deal breaker when there are so many options for music making gear. Luckily my business has been doing really well this year, despite the economy, and I had recently sold my Korg OASYS 88 on eBay, so I started the research phase. This included a bunch of emails off to the Open Labs support team regarding various things, and they had good answers to my questions. Prompt and coherent, as I like to say.
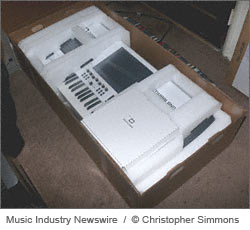
NeKo TSE packingAfter watching the videos on their website (www.openlabs.com) and on YouTube, reading forum questions and answers, older reviews in the major magazines, etc., I ended up ordering one from the AudioMidi.com folks here in California (also always nice to work with). I do buy a lot from the folks at Sweetwater (shout out to Delvin Wolf), but they didn’t carry the NeKo. Apparently others made the jump on this new model the same time I did, so there was a waiting list (the 37-key version shipped first, which is perhaps more popular with the hip-hop/DJ crowd thanks to smaller size).

Getting the box from UPS after about 10 days was a delight as the box was professionally silk screened with Open Labs logos (unexpected quality there), and the packing was very competent for a product of this kind (see photo). Had very much a Christmas morning feel, which is always a good sign. It was not quite as obsessive as some of the Yamaha gear I’ve bought where they must have a custom cardboard factory someplace for all the engineering they put into packing, but far better than a Roland V-Synth keyboard I got where the packing practically had to be broken to get the gear out.

I was a little surprised there were no CD/DVDs, a printed manual, or anything inside the accessory box aside from a hex wrench, a getting started sheet (11×17, color), and power cable. Of course, I then realized that with two 500GB hard drives, the help files, video tutorials and whatnot would be on the TSE, which they were. I still would have liked a small printed manual, but perhaps my dinosaur bones are starting to show on that – in this era of reducing paper waste, and the fact that just about any tech manual is obsolete months after it’s been printed, it’s a good environmental and cost-saving choice.

Once out of the box and on a stand (I’m using the Standtastic 103KSB, seen in the photo) it was a quick shot to plug-in speakers, a second monitor, and start making noise. Thanks to its use of Windows versus a custom version of Linux (ala Muse Receptor), installing virtual synths like IK’s SampleMoog (see photo) or Arturia’s CS80 emulation was as simple as putting the disc in, exiting the GUI, installing the applications under Windows, connected to net for authorization, and done. It took the better part of a day to install various things I wanted to play with like the Korg Legacy collection, some East West instruments, and the now defunct Gigastudio VST instrument.

I really like the front panel (below the pitch/mod wheels) audio controls on the FireBox, for setting headphone and monitor out levels. Having two mic or instrument inputs “right there” at hand is nice, too, without having to remember which input is which on the back or pulling it off the rack to plug something in. The snazzy metal audio knobs have detents so you can actually set a headphone level “just right” and go back to it later. I have been a long time fan of Echo Audio products, and was new to the PreSonus line, but am really liking what they do. Aside from ergonomics, it appears this was a very good choice for “quality” and not just size. Open Labs has pre-set everything installed to run with the drivers (via ASIO), so you don’t have to worry about manually setting anything; and switching from 44 to 48Khz was simple using the ASIO panel.

The Player in the House
One of the things which make this product really fun as a keyboard player is finally being able to treat a virtual instrument as a keyboard. Sure, you may think using a notebook and a MIDI keyboard controller is just as nice, but not as far as I’m concerned. Being able to load up the Korg Legacy Collection Wavestation instrument on the NeKo TSE, and play it “right there” as if the keyboard had morphed into a real Wavestation (I’ve missed mine for years). You can even use your fingertip to move the virtual joystick on screen. Not as fluid as a real joystick, but much better than using the mouse in my opinion. Basically, any virtual instrument which has a standalone mode seems entirely new again when played on the TSE. I had a blast playing IK Multimedia’s SampleMoog on the TSE while writing a review of the software (see photo).

Playing IK SampleMoog on the NeKo TSEAnd, for others without a standalone mode, you’re a few taps away from loading something into Karsyn. I was impressed that Karsyn even has a drop-down menu of “recently added” instruments and “recently used” plug-ins, so when you first install something like Spectrasonics Omnisphere, you don’t have to go hunting through dozens of instrument menus to load it up.

There were some minor problems which came up, which was the pitch bend didn’t “center” properly every time, which I hadn’t run into as a problem since the days of my Oberheim XK keyboard controller with levers in lieu of wheels. Also, I found the final D# and F# keys made a “clacking” sound on release. I determined that the metal case top was a hair lower than it could be, and simply taking off the right end panel and holding the case top and re-tightening the right hand side screws solved that. For the pitch bend problem, tech support confirmed this was an issue that they could reproduce, and a week later they had a firmware update which they installed remotely for me over the Internet. No trouble since.

I requested they consider adding an option in mFusion to route the aftertouch to the mod wheel for those applications which don’t support MIDI aftertouch (many don’t), as it can be strange in this day and age to apply pressure and nothing happen. This is not a problem with the NeKo, as some non-owner forum trolls will assert, but lack of aftertouch support in the virtual instrument being played.

The fit and finish of the case is very nice with the exception of a little area under the left side of the keyboard which looked like it should have been sanded prior to painting, as it has a bit of a coin edge versus being smooth which seems out of place with all the rest of the edges on the case.

The controllers work well, although the notebook PC style touch pad for mousing takes a bit getting used to, and is a bit twitchy on some screens, just like a real notebook. I sometimes felt the touch pad was too sensitive and the select buttons required too much pressure. Generally, I found myself using the LCD panel whenever I could. I may end up adding a Logitech cordless USB trackball, maybe not.

The overall presentation feels good; not quite the industrial grade manufacture of some big name workstations, but way way beyond the built-in-garage hot rod approach. This is a mature, commercial product line and it shows.

Inside the NeKo TSE

Inside the Box
When looking inside the case to add some options (see photo), I was really impressed by the Zalman case fan, high quality power supply, high quality memory, very efficient wire routing and tie down, as well as epoxy glue on some of the connectors to keep them from coming loose in transport (essential for gigging). The glue was a nice touch, as I can’t tell you how many times I’ve had to open my DSI Poly Evolver rack mount synth to push the little connector for the front screen that hair’s width needed to make it work again.

For the trolls in some of the forums who complain that the NeKo is nothing more than a PC and a keyboard controller bolted together, it’s worth mentioning the plethora of custom circuit boards inside the case (not shown) which handily disproves that assertion. There is way more engineering in place for this than even I (being a techie guy from way back) was expecting. That’s why it works so well: it’s engineered, not cobbled together.

NeKo TSE upgradesI’ve also customized my NeKo TSE by adding an internal FireWire card (mandatory if you want to use another audio I/O box while the FireBox is installed on the main FireWire bus), adding a mini USB hub inside to mount my iLok and Syncrosoft keys, and I’ve added another 500GB hard drive to use for sample libraries. This was done under the auspices of normal upgrades which won’t void my warranty, but you must be careful here if you don’t know what you’re doing (see added note regarding warranty, below -editor).

My only complaint was the cost of the brackets to mount the third hard drive, which was about $100 for two brackets and some screws from Open Labs. Sure, it’s custom cut premium aluminum, with grommets for vibration, but considering you can buy an entire Antec PC case for that, it was tempting to simply use the leftover parts I had laying about and tape down an Antec bracket I had (actually I did just that while waiting for the parts to arrive in the mail). Still, the OEM part is nice, but it cost as much as the 500GB hard drive, which seemed wrong somehow. Not evil mind you, just pricey.

Editorial note: after this story had been published, Open Labs requested I add the following note regarding the warranty: “This warranty does not apply: … b) to damage caused by service (including upgrades and expansions) performed by anyone who is not an Open Labs Authorized Service Provider; c) to a product or a part that has been modified without the written permission of Open Labs.” — which basically means if you don’t know how to install a hard drive into a PC already, don’t mess with your NeKo! As I’ve mentioned in my postings to the Open Labs tech support forum, you should always consult the tech gurus at OL prior to doing anything inside your keyboard, unless you truly know what you’re doing. More info: http://openlabs.com/warranty.html .

Other Choices
There isn’t a lot of competition for this product on the market. The Korg OASYS is a closed system, and suffers from a “let’s make everything new” mentality, which walks away from the huge library of sounds of the Triton era, and while it can sort of morph into a few vintage instruments like the MS-20, it can’t become a Wavestation, or stack instruments in place within “combis” to make hybrids of the various technologies included, and the OASYS recording environment is inferior to most software tools, such as Reaper included with the TSE.

The Muse Receptor (www.museresearch.com) is a versatile instrument for touring and studio use, and works very well, but it’s not a keyboard instrument in the same way a workstation like the TSE is. You “hook up” to the Receptor, you don’t “play it.” The Receptor is also currently hampered by the fact it’s running a version of Linux and can’t easily load many Windows plug-ins without special installers. If you need a dedicated box to run Native Instruments or IK Multimedia’s libraries, it’s a good choice for that, but it still requires a DAW and MIDI controller. I found the built-in synth rack to be versatile, but cumbersome, and it is really setup for those who want to program live sets versus just loading something and playing it.

Similarly, the SM Pro Audio V-Machine (www.smproaudio.com) is a standalone VST player in a box, but adds support for Magix Samplitude 9 SE, as well as a nice selection of virtual instruments. The initial product is more geared for musicians using a notebook, and the box has only a 1GHz CPU, so you won’t likely be recording full on game soundtracks with it, but it’s insanely affordable for what it is.

And, yes, you can simply go out and buy a keyboard controller, a notebook, and a USB sound box for portable composing. In fact, I considered buying a top of the line CME or Novation controller with all the knobs and sliders, along with a PreSonus FireStudio, and a new HP TouchSmart 20″ LCD PC and “rolling my own” type of product along these lines. What I found, however, is that the “value add” provided by Open Labs with the NeKo TSE made it exactly what I wanted. The integration of the pieces (the control surface is pre-set to work with the E-MU sound library for instance), and the huge amount of work which has gone in to the pre-sets and a “clean” install of everything on board. It works for me, and I have no regrets about “should have done blah instead.”

Bottom Line
In practice I’ve had zero crashes, downtime, glitches or problems beyond a personal adventure in replacing the FireBox with a couple of PreSonus FireStudio models as the main audio I/O (another story). I now have both working and can choose which to use, depending on what I’m doing. I’ve also added the PreSonus FaderPort and the monitor controller for the FireStudio, which sit perfectly above the PC keyboard on the top left side of the TSE. For those who need additional controllers like drum pads, the new Korg Nano line is perfect as an add-on to the NeKo.

FIVE STARSAs far as running other DAW applications, Cakewalk Sonar 8 works great, and the only glitch of any kind I’ve had has been the streaming option turned on within Omnisphere, and the screen redraw in most recent update of East West Play engine. However, I don’t consider these to be issues related to the NeKo TSE.

For any keyboard player who wants a real workstation, complete with a vast sound palette, truly usable recording system, and those who also want a great live performance instrument, the NeKo is an excellent and unique choice. Some may find it pricey, but in my opinion it is well worth every penny once you discover everything you’re actually getting.

Summary:
Music Industry Newswire rating: FIVE STARS.

Open Labs NeKo Timbaland Special Edition (TSE)
www.openlabs.com

61-key workstation based on Intel Core2Quad processor, 4GB RAM, two 500GB Hard Drives, dual-layer DVD burner, PreSonus FireBox audio and MIDI I/O. Exclusive sound libraries with 35GB of premium sounds; custom licensed versions of instruments and DAW recording applications. List price: $4999.

PROS:
Good value when all the pieces are priced alone; great integration between instruments and bundled software. Good ergonomics. Great technical support; including remote fixes/updates, prompt email and phone call-back support. They even monitor the tech support forum on their site daily. Extremely playable. It is compatible with all Windows XP applications. PreSonus audio hardware an excellent choice; ASIO drivers seem to work with everything. Upgradeable as technology changes (new motherboard/processors) via upgrade path policy.

CONS:
No printed documentation beyond hook-up sheet; lacking documentation of any kind for certain things like video card settings to enable second display. Bracket for third HD is a bit pricey. A PC build sheet outlining motherboard model, video card capability (resolutions and timings supported), CD/DVD burner specs (in case of firmware update needed); used/open SATA, USB and FireWire ports, and similar data would have been nice to have in the unlikely event the company disappeared.

More information and tech specs on the NeKo TSE:

http://openlabs.com/ .

Article is Copr. © 2008 by Christopher Simmons. All photographs are the exclusive property of, and are Copr. © 2008 by Christopher Simmons, all rights reserved. Article originally appeared on MusicIndustryNewswire.com.

Categories
Music and Recording Reviews

Review: IK Multimedia SampleMoog

REVIEW: I’ve been a fan of the late (and sadly missed) Bob Moog’s various sound creation inventions since the mid 1970s. I first saw one of his theremins at a Southern California museum and while the rest of my family perused the other modern art; I spent most of the day at the theremin making other-worldly tones with a wave of my hands. This led to a very short batch of piano lessons, from a family friend, but those lasted only a couple of weeks since he moved his family to a commune in Oregon. During this time I learned about other keyboards, and the nascent synthesizers being built at that time by Mr. Moog (pronounced like rogue, NOT like a cow mooing).

I was intrigued by Isao Tomita’s album “Snowflakes are Dancing,” played with Moog gear, which my mother had bought (my parent’s musical tastes were a bit eclectic), and the soundtrack by Jerry Goldsmith for the film Logan’s Run which I saw in super-surround at the Los Angeles Cinerama dome on its premiere.

IK Multimedia SampleMoogIn 1975 (at age 13), I got to play with a Minitmoog for a week, and even though I was asking my parental units for photography gear to pursue my interests in the creative arts, they gave me a choice of the Moog (owned by a business associate who wanted to sell the small keyboard), or a 35mm SLR. I chose the Fujica ST701 camera, bought at a Long Beach pawn shop.
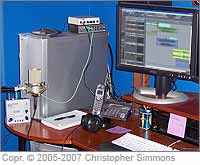
It was years later before I got back into synthesizers, but played a family two-tier organ for many years. The first synth I ever purchased brand new was a Sequential Circuits Pro One the week they were released. Dozens of keyboards later, stints in bands, some pro soundtrack work, and the usual, I finally got a cheap Concertmate Moog from Radio Shack, and a couple of years ago finally got a Moog Voyager. I’ve owned four Moogs personally, and played many others.

So, I was pretty interested to see the new virtual synth from IK Multimedia, which takes on the Moog and creates something of a “living museum” of arguably the best sounds from the history of instruments to bear Bob’s name (even he didn’t design some of them), would play. And, the theremin of my youth (ahem, 30+ years ago) is even one of the instruments to be included. IK wisely chose to sample the instruments, and then put these samples into what looks to be a re-skinned version of their SampleTank LE product.

Inside the box there’s two install discs, a nice-sized manual (kudos for including something us dinosaurs can read while watching 60 Minutes and not have to suffer through some illiterate web pages, YouTube videos or endless PDF tutorials to get started!) and registration card. The install is simple, and I actually appreciated having a separate installer on each disc for those sample folders, versus one giant multi-disc install. I’ve had a few problems with those 5-disc installs, where something goes wrong (are you listening Native Instruments?) on one of the discs, or something is missing, and it takes a second try, or skipping the missing data to get to the launch screen.

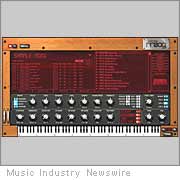
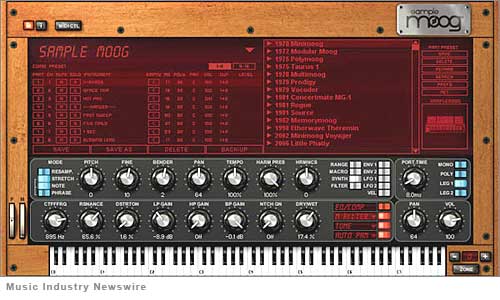
The layout is similar to other IK instruments, as you would expect, except there are vintage looking knobs across the bottom which give you a “feel” of a classic analog, without attempting to fully recreate any specific synth interface (see the included screen shot image). For example, rather than having all the knobs visible, you toggle to different groups for things like ENV1 (envelope 1, a nice AHDSR setup), or ENV2, filter controls, LFO1 and 2, velocity, key range, and sample engine options (normal sample engine, or STRETCH engine which allows some resynthesis options to mess with the sound a bit more than possible using typical sample playback and filtering).

It’s a nice mix of “simple” with some added features to go deep if you want to. So, while it’s not a virtual “emulation” of any one instrument, it does provide some features to modify, mix, and make your own patches from the included sample elements.

An included multi-effects unit provides 32 effects, with four effects slots. I was very happy to see a classic spring reverb, as my first mixer from Peavey had that, as well as my keyboard amp which had a “Marlboro sound blender” with spring reverb and delay. Vintage all the way. Typical DSP FX include reverb, ambience, delay, filters, wah, chorus, phaser, flanger, panning, tremolo, distortion, phonograph, crusher, and even some guitar cabinet and amp modeling. While these may seem like a bit out there for a keyboard sample player, or some garden variety DSP FX module re-purposed from another plug-in, the reality is that back in the ’70s and ’80s, the Moog was actually run through guitar amps, vocal boxes, stomp boxes, and other gear to make the electronic instrument sound weirder, bigger, wider, or just plain distorted since electronic keyboards did not contain any built-in effects in those days before DSP chips.

Ironically, when I first launched the SampleMoog, I was a little disappointed that the standard Minimoog patches all seemed to be “stereoized” when the original instrument was mono (not stereo). Since I own a Voyager and run the output in mono, the patches didn’t sound right, until my brain caught up and remembered that almost everybody runs the thing through either a stereo chorus, and/or delay pedal. Ahem, including me. So, when you listen to many of those old records with a Moog lead, it’s usually running through a chorus with comb filter to fatten it up to stereo, and a delay to create the echo-tail and thickening. So, after I started to go through the sounds, I got it.

IK and their sister company, Sonic Reality, have done a good job of creating “playable” sounds, and then very interesting multis/combis to give you a “produced” instrument sound — which is more like what you’d hear from a famous Moog artist, than what you would hear noodling with the actual keyboard at your local music store. However, you do have access to the original samples as patch elements, and you can easily switch from stereo, to mono, to spot-on legato modes of any main patch.

So, what instruments does SampleMoog cover? It contains a wide variety of the known and lesser known instruments, including three Modular Moog set-ups, a classic Minimoog Model D, Polymoog (best known perhaps from songs by Gary Numan), Taurus 1, Prodigy, Multimoog, Vocoder, Concertmate MG-1, Source, Rogue, Memorymoog, Etherwave theremin, Minimoog Voyager, and the more recent Little Phatty.

The manual includes a paragraph on each for historical purposes, but when using the virtual instrument your only feedback to which instrument you’re using is a tiny red outline icon mid right on-screen (similar to what is found in other virtual instruments like Arturia’s Analog Factory). I would have preferred something larger, perhaps in color for the nostalgic sense of using sounds from the vintage instrument, but since this instrument appears based on the SampleTank layout, there isn’t a lot of room for customization of the layout. In fact, this is my only real complaint with either the standalone or plug-in versions, is the lack of ability to change the interface; specifically the colors. Much like SampleTank, this instrument uses the “company colors” of LED-like red-on-black, which looks cool, but is generally difficult to read on a 15-inch LCD and for anybody having some aging eyes, color/contrast vision problems, and the like. Being able to switch the background color to white-on-black, or the snazzy black-on-blue of their SonikSynth instrument, or the yellow-on-black of the SampleTron, would seem to be a much-needed feature for all of IK’s standalone products.

In fact, I found out earlier this year when I was originally going to review this product that I had cataracts (congenital, which kicked in when I hit 40), I was unable to read the screen very well at all, and the screens in the manual were big black/grey blobs. Even after surgery and having my eyes back to 20/20, the elements are not as easy to read as they could be. Adding a color toggle to the right of the MIDI control button at top left would be a much welcome feature.

Regardless of that minor issue (unless you’re going blind), this collection is like a mini-museum of sounds that capture the flavor of Bob’s legacy at a fraction of the cost of buying even one of the actual instruments. For most musicians, there is no need to have the “actual” keyboards to put that famous Moog sound into the mix, thanks to SampleMoog. With over 1,700 sounds, and some really nice options to make the sounds your own beyond simple attack-decay filters, this is a pretty neat package. And, while I love some of the emulation instruments on the market, the benefit of “sampled” instruments is that you’re hearing the real Moog filter, not a recreation, and that unique combination of electricity running through wires and Bob’s circuit design is what makes the Moog instruments stand out, remain viable and highly desirable today.

Adding to its street cred, the product was developed in cooperation with Moog Music, and so it’s not a typical sample library with suggestive names like “mog lead” or “classic 70s.”

FIVE STARSI can highly recommend this product to anybody who loves the sound, even if they already own a Moog or two (as I do), because the choices made in instruments and sounds to include is spot-on. The FX and filter controls give you tweaking power over the core elements of the products’ sound, without having to worry about the reliability (or lack thereof) of vintage hardware. SampleMoog is also perhaps a better choice for those who want a wider palette of Moog juicy goodness than some of the emulations of Moog instruments on the market, since the difference in sound between the various models is sometimes very notable (take the Memorymoog, the Taurus pedal, and the Little Phatty, for example). Since the Memorymoog sounded more like an Oberheim than some other Moogs, when you layer that with the Taurus you get some really really cool things happening in your ears. If you want a Moog and can’t afford the current hardware keyboards available from Moog Music, then this is a no-brainer. All in all, a first class product and a nice combination of features to appeal to the widest range of musicians.

Available most everywhere that sells music software, for $269-$329, depending on cross grade, or street pricing. (See the IK website for cross-grade information.)

More information: http://www.ikmultimedia.com/samplemoog .

Music Industry Newswire rating: FIVE STARS.

Specifications (the laundry list):
Software features
Works as a standalone application, as well as a plug-in
Fully compatible with Mac OS X (Universal Binary), and Windows (XP / Vista)
Supported plug-in formats: VST, RTAS, and AU
Over 600 multi-sampled sounds, over 1,000 preset patches, and more than 4 GB of samples included
16 part multitimbral
256 notes polyphony
16 individual stereo outputs
Mix view and full mix parameters control
32 DSP-based multi-effects (see Effects List)
Range Control allows for creating complex splits and layers
Total sound editing with full access to 50 Synth-Sampler engine controls
Instrument browsing
BPM syncable LFOs
Portamento Time control
Zone feature for single sample accurate editing
Part Volume / Pan controls
Expanded easy to use full MIDI control
Part and Combi preset save features
Convenient back-up function
Search function
Sounds can be read by SampleTank 2

2 Synth Engines
Newly enhanced STRETCH(tm)
Traditional Resampling

Effects list
Reverb, Spring Reverb, Reverb Delay, Ambience, Delay
Filter, Envelope Filter, Multi Filter, Wah-Wah
Chorus, Multi Chorus, Phaser, Flanger, Envelope Flanger
AM Modulation, FM Modulation
Auto Pan, Tremolo, Rotary Speaker
Lo-Fi, Distortion, Phonograph, Crusher, Overdrive
Pre Amp, Tone Control, Cabinet
Parametric EQ, Channel Strip, Compressor, Limiter, Slicer

3 Performance Modes
Poly
Mono
Legato 1-2

Article is Copr. © 2008 by Christopher Simmons – all rights reserved. Story originally appeared on MusicIndustryNewswire.com. Disclosure: a free NFR review copy of the software was provided to the author of this article.

Categories
Articles Music and Recording

Christopher’s Savvy Guide to Podcasting – Part Three: Outline of Producing a Show

ARTICLE: CHAPTER TWO: Outline of Producing a Show — Choosing to create your own Podcast can be approached in several ways, which will vary depending on your goals. For the kinds of Podcasts we’re going to cover in this article series (originally intended for a book) and this chapter, it’s generally assumed you have a personal computer with an Internet connection, which would be the primary necessity for the typical form of Podcasting.

Podcast Station 2005Although it’s technically feasible to record a Podcast from any telephone by setting-up an account with a Podcast Hosting provider, and use an Internet Cafe to check the show, this would be the least likely method used by the average person reading this article series. On the other hand, this method might be ideal for a “world traveler” who is doing a show about a journey or simply on the road a lot.
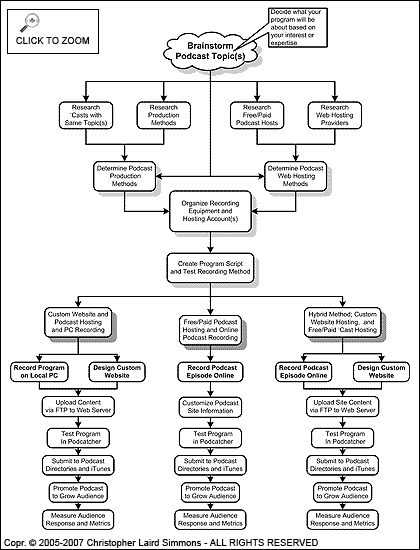
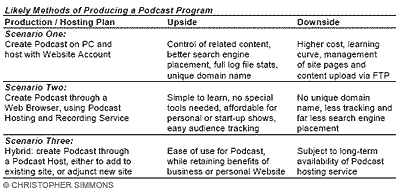
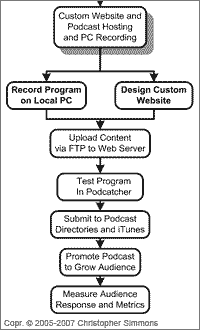
In this chapter:

  • Getting Organized
  • Overview of What’s Involved in Producing a Show
  • Scripting a Show and Creating Guest Questions

Getting Organized
Starting the journey of producing a show might involve evaluating the best process for recording and hosting a program.

Things to consider in getting organized:

  • Pick a topic or focus for your program
  • Evaluate and determine if you will use an online Podcast posting service, or host your show on your own Website
  • Choose how to record (on your PC, or online, with free or commercial software)
  • Acquire tools needed such as microphone, audio interface, phone interface (for recording phone interviews), software, determine how to generate RSS Feed File, either through software or by hand
  • Sign up for online Podcasting account, or Web hosting account and domain name (if you don’t already have one)
  • Prepare possible list of program “episodes” and guests
  • Record Program(s)
  • Optimize for Web including META data
  • Get content online and into iTunes
  • Advertise and promote show
  • Measure and track audience
  • Live happily ever after

Overview of What’s Involved in Producing a Show
In the following flowchart (Figure 2-1), you will see an overview of a possible procedure for first evaluating how to produce the show, then upon choosing the appropriate method, moving forward with production, implementation, testing, and marketing.

As you can see from the flowchart, the first step is to decide what your show is going to be about. Actually, if you’re a prolific person with lots of interests, or a business owner with many diverse offerings, there is no reason you can’t create multiple shows for different audiences.

Chapter 2, Figure 2-1
Figure 2-1: Flowchart of program development tracks. (CLICK for larger version.)

This process can include evaluating existing programming using a Podcatcher (see Chapter One, Part Two of this series) to see if you can do something better. For a business you might check out what the competition is doing. For a personal show, you might decide to do something different if there is already a glut of the topic you were thinking of doing. Of course, just because there are other shows out there on your chosen topic, there’s nothing to stop you from bringing your own “flavor” to the idea. Think of ice cream, there are more outfits offering ice cream each year, and it’s still pretty much the same thing, but each new offering brings its own customer base.

So, looking at Figure 2-1, the left “track” involves evaluating program topic(s) and recording methods, while the right “track” involves evaluating the best way to put your show online.

In this chapter we’ll take a look at choosing the best way to produce a show for your needs, and in the next chapter we’ll get into the actual steps in recording a show. By evaluating these two chapters you should have a very good sense of which approach to use. Chapter Seven also has additional information on the hard costs, and hidden costs, to all methods of hosting a Podcast, as well as some how-to information on managing content that must be uploaded to a Web server via FTP (File Transfer Protocol, which is a special way of sending files to the server’s hard drive from your PC).

The Three Likely Production Methods
In the following comparison chart, you’ll see a quick look at the three most likely methods of producing a show which are also noted in Figure 2-1.

Basic Overview Chart

Scenario One
The first choice would be to add a program to an existing business or personal Website (as in SimChris.com but with your own site name). Under this scenario, you would either be adding the show to a site you already have that describes your services, or is a personal blog or company entertainment site; or, you would be creating a new site specifically for the Podcast(s), where you could build supporting content and information about your show and each episode.

The benefits to this approach are enormous from a marketing perspective because the content lives in one place online over which you have total control, belongs to you, is portable from one hosting provider to another, and allows for building support pages for each show and tracking the audience of all your materials in one system. The downside is that this takes some planning, some ongoing maintenance of your account, and content management completely separate from your Podcast .

Some of the other benefits include peace of mind. For example, if the free Podcast hosting provider or your Website hosting provider goes out of business, you have all your content, you own your domain name, and you can easily simply point the domain at another hosting provider and your downtime would be as little as 48 hours. For advertising and marketing purposes, it makes way more sense to invest your time and money into promoting your own domain name over something like bluetoy.podomatic.com.

If you want to earn immediate revenue from your Podcast site, you definitely need your own Website, because you can add Google’s AdSense program to your pages, and when people come to your site, relational advertising is shown and you earn a commission on each click. For example, if your Podcast site is about animal rescue and pet nutrition, and you have a page for each program episode that describes information about the guest or the references that inspired your episode, the AdSense program would automatically put pet nutrition related advertisements on your site pages. By having a unique page for each episode, the page can more likely be found in search engines which drives people to discover your show, and for your audience members who found the show through a Podcast directory, it leads them to your site to learn more about the program.

Scenario OneWhat would you put on an episode page? Well, you could have a page that includes photos of what you’re covering in an audio program, such as an interview; for a music guest, you could have a bio and CD covers, and you can include bibliographic information that might be tedious to listen to or write down for a listener to your show.

For another example, let’s say you have a Podcast program about digital photography. For one episode, you might have a program about how to find the best deal on Nikon digital SLR cameras, and your experience as a new owner. On your episode page, you might include sample photos taken with the camera, list all the accessories and options for the camera model (e.g., flash, lenses, cases), manufacturer image of the camera, and sample pricing from different vendors. This can be a huge benefit to an audio-only Podcast because it invites your audience to visit your site and interact with you, perhaps even leave comments about the episode, or click advertiser links to “support” your program. Then, in your Podcast, you end each episode with “for more information about this episode, visit our Website at ….”

Yet another benefit to managing your own site is that you can solicit donations for your efforts, by setting up a PayPal account (an eBay company, www.paypal.com), and putting a “donate” button on your pages. Over the past several years this has proven to be a viable way to earn some money for your efforts, and tens of thousands of people take this approach to letting their audience contribute to the continuation of the show versus charging some kind of subscription fee. It’s much like the “shareware” approach to software, where programmers offer their applications for free, and people are encouraged to pay for it if they find it truly useful. It won’t pay your rent (most of the time), but if people want to support your pet rescuing or digital camera testing efforts, it sure doesn’t hurt!

Finally, another superior benefit to this first approach to creating and managing your program is that you have access to what are called the “raw log files” on the Web server. If a hosting provider doesn’t offer this, go elsewhere immediately. Although many hosting providers offer some basic “site stats” monitoring (often a popular program called Webalizer, see Chapter Ten), the raw log files are the big daddy of information about what is going on every time somebody visits your site, reads a page, downloads a Podcast file, or tries to hack into your site maliciously (yes, this will always be going on no matter what kind of Web presence you have — it’s primarily a nuisance and not a fire alarm to worry over).

Being able to obtain, download and generate reports from your log files is critical to measuring your audience from any Website. The log files do exactly as the name implies, it “logs” every visitor to your site and tracks all kinds of information such as where the visitors are coming from (such as a search engine, other Website link, advertisement, and country), which page or other file is viewed the most, and obscure things like kind of Web browser used, operating system, and even the keywords used to find a specific page from major search engines. And there’s more! The log file even gets down to the level of how long each visitor stays on your site, the average number of pages they view, and what day and time of day has the most visitor “traffic.”

Your log file — well, log files actually — are explored using a software program called a Log Analyzer, and this subject is covered in more detail in Chapter Ten. The Log Analyzer slices and dices all the data so you can look at specific months, generate reports to court advertisers, and determine if an online advertising or search engine marketing strategy is effective or not. A log file is not a hit counter, which can count page visits and some other data, instead it’s the in-depth logging of everything going on with your site every hour of every day.

The reason I’ve dwelt on this for a bit, is that with any free or inexpensive Podcast hosting service you may not receive any tracking, or the cost of adding tracking options might put the cost at about the same as having your own Website to begin with. On the other hand, some sites like Podomatic.com do provide an option for pretty good basic tracking reports when you switch from a free account to a $10 per month account.

Again, this may be adequate for a personal or start-up show, but not a commercial site, or for those wanting to do some serious online marketing through search engines.

Scenario Two
If you’re doing a fun “home brew” program about a topic that interests you, or for which you are an expert or experienced person with opinions to express, you might not be overly concerned with initially want to sell advertising or getting a sponsor. In this scenario, you may or may not want to set-up a special Website for your program as I’ve outlined in the previous section, above.

The benefit of having your program hosted through a Podcast-specific hosting service, or with something like Apple’s .Mac service, is that you don’t have to worry about things like domain names, creating pages in HTML programs, or learning to FTP files to servers. With some Podcast hosting services, you can even record your show by phone, and you don’t even need to deal with software, microphones, or the like.

Scenario TwoOne of the downsides to creating a program that lives on any kind of “free” or “hosted” Website that is not your own, is that when promoting your show, you are actually promoting the site where your show lives as much as your own program. When you have your own site, all of your promotion efforts will always be towards getting folks to visit your site, and if you launch new shows, retire old shows, or “remix” content, it’s all under your control, which is not the case with a “hosted” solution.

Still, it’s ridiculously easy to set-up a Podcast within half an hour with a site like Podomatic.com, Gcast.com, or Hipcast.com (to name a few). In an upcoming chapter I walk you through setting up and recording a show with Podomatic. If you’re a musician, Gcast is a good choice because it’s tied into GarageBand.com which, as the name implies, is a wonderful portal for independent and unsigned musicians. Podomatic and Gcast are free, while Hipcast has a base fee of $5 per month to get started (free trial period) but has some neat tricks for those wanting to do video ‘casts or tie in a personal blog on the same site. If you have a new Mac, it’s wise to look into the options included with a .Mac account.

If you don’t want to have your own domain name, don’t want to learn to build Web pages supporting your show(s), or deal with optimizing files, uploading files, or the like, then this second scenario of doing it all online may be the perfect choice. And, you can always change tracks later if you wish.

One real downside is that if the free Podcast site goes out of business (so many “free” Web ventures of the past decade have disappeared that it’s a genuine concern) you might lose all your content, your subscribers, and all the hard work you put into it. Thus, it’s critical to make sure you subscribe to your own show, and download all the files you create online to your PC, and then back-up the files to CDR or DVDR for posterity and security.

Scenario ThreeScenario Three
In this scenario you combine the best of both worlds. For instance, if you have an existing site where you may have hired a designer or Web firm to build it for you, it might be time consuming to learn to record audio and implement a Podcast and add a new content section on your site.

However, it’s relatively easy to record a show on a free Podcast site, then simply have your Webmaster or site manager link to that on your existing homepage.

This approach can allow you to “test the waters” with minimal or no investment, and then decide if you have the time and inclination to pursue creating regular content, and if your customers or audience find it valuable.

Scripting a Show and Creating Guest Questions
One element often overlooked by new ‘casters, is the idea of scripting your show. This can include writing the intro/outro for each show which stays the same, so that you don’t have to re-record it each time (such as “Welcome to the Sten and Rimpy Show, where cartoon animals tell you what to watch on TV”) and the copyright info and plug for website which might end each show to fade out.

A program lineup can be a rundown of possible show topics, placeholder titles, and possible guests, and even target publication dates (“air date”).

These elements can be tracked in various ways, such as in Microsoft Excel (or similar spreadsheet program), or using index cards on a bulletin board, with one card per program episode.

Guest questions can be far more effective if you make yourself a short list of ten topics to cover, with possible follow up questions. This keeps you from flailing about with things like “how’s the weather down there,” which you’d likely need to edit out later.

By having some actual questions in mind, you can also help steer the path of the interview so that it doesn’t meander all over. In coming up with your questions, it’s a good idea to do some background on your guest and locate possible past interviews so that you’re not asking the exact same questions he or she has already spoken about over and over. By having more “involved” questions from you, it’s more likely you will elicit a far more human response from your guest, which will be more interesting to your audience.

While it’s certainly a learning adventure to produce a personal podcast without any pre-planning and just “run with it,” you may find that in order to produce a regular consistent show, you need to consider some of these processes in order to maximize your own time spent.

For a business program, or marketing effort, it’s also essential to treat the program as a project with deadlines, structure and consistency in order to sell advertising or generate revenue through a subscription model.

Organization and planning can help make your program more consistent so that your audience has a comfort level that they can come back for more, and that there will actually be more. If you do programs at oddball times, skipping weeks, or months between, you run the risk of being dropped from subscription lists in Podcatchers. If you plan to do a regular weekly or monthly show, some of the topics found in this and upcoming chapters may help you in keeping on track.


Coming in Chapter Three (Part Four in Series)
CHAPTER THREE — Recording Options for a Program
* Tools You May Already Have
* Two Track or Multi-Track Audio
* Choosing and Set-up a Microphone
* Make Your Own Podcast Kit


Article is Copr. © 2005-2007 Christopher Laird Simmons – all rights reserved. This article series, including text and images, charts, and glossary, is protected under U.S. and international copyright law – unauthorized reproduction or republication, online or offline, in whole or part without express written permission of the author is strictly prohibited. Originally intended for a book, “The Savvy Guide to Podcasting,” this content also appeared on MusicIndustryNewswire.com.

Categories
Articles Music and Recording

Christopher’s Savvy Guide to Podcasting – Part Two: The Basics

ARTICLE: CHAPTER ONE: The Basics — If you’ve read the introduction to this series of articles, you may have an idea of what a Podcast is all about, but now we’re going to start getting into the details; the specifics of what, where and how to listen to or build a Podcast program.

In other words, this chapter will give you some of the basics about what is going on when a Podcast is being created and listened to.

In this Chapter:

  • What is Podcasting
  • Podcatching 101
  • The Difference Between Internet Radio and Podcasts
  • Where Did Podcasting Come From?

What is Podcasting
The simplest explanation is that a “Podcast” (iPod + broadcast = Podcast) is an audio or video program which can be viewed online or offline, and which can be “subscribed to” using special software on any personal computer and selected media players like Apple’s iPod. Through a subscription mechanism called RSS (Really Simple Syndication, or Rich Site Summary), Podcasting provides a simple way for interested parties to find, subscribe to, retrieve, and listen to (or watch) Podcast “shows.”

A Podcast can be a talk show where guests are interviewed, political commentary about government issues, a movie review program, lifestyle tips for new parents, tutorials on how to fix a car, or just about anything you can imagine. It can be a slick, Entertainment Tonight style program with background music and high production values, or a personal journal of places to stop on Route 66 recorded on a pocket audio recorder. Pretty much anything than can be recorded in audio or video format can be made into a Podcast by converting the content into a Web-ready format, and creating a RSS “feed file” that tells people how, where and when they can get your show.

Web directories, like the Apple iTunes Music Store, can sort and categorize Podcast programs based on “tags” found in the RSS feed file that describe program episodes and other data about the overall program such as who created it and where to find it on the Internet.

You do not need an iPod, or any portable entertainment device, to listen to or subscribe to a Podcast, but many devices, including Sony’s PSP and Motorola iTunes-capable phones (or any MP3 capable phone), can play Podcasts. A Podcast is “subscribed to” using a “Podcatcher” (or news aggregator), which is a computer program designed to regularly “check in” with a particular Podcast’s RSS feed file for updates, and “catch” the latest “episode” for a subscriber to listen to.

Figure 1-1 (c) Simmons
Figure 1-1: Relationship between PC with Podcatcher, connecting to a Web server and RSS feed file that points at the actual program episodes.

To be clear, almost any media device which can play a MP3 format audio file can “play” a Podcast, since it’s essentially no different from a song file “ripped” from a music CD. What makes Podcasting different is the ability to get updates automatically via RSS using a “feed file.” So, your Motorola RAZR phone with Web browsing can be used to download and listen to a Podcast episode “on demand,” but does not have the ability to (yet) run a Podcatcher application to go out and grab new episodes automatically. Some folks are calling this kind of ‘cast a “Mobcast” or “Mobicast” (mobile + Podcast/broadcast = Mobcast).

The Podcatcher is used to subscribe to a “feed” which is a small file using XML “tags” that tells the application when your Podcast has been updated, and where to obtain the latest file, which is typically a MP3 audio file, but can really be any type of audio or video file format including RealMedia, Apple’s AAC, QuickTime or even Windows Media. Note that using certain formats will limit the audience, as some formats won’t work with every device or software.

It’s important to be aware that a “Podcast” is simply a term for a movement which began on the Internet long before Apple’s iPod music player existed or the term was coined. It’s about the sharing of rich media (audio or video) information in such a way that anybody can easily find and subscribe to such content without having to manually return to a specific Web page over and over to see if there’s something new.

Some folks who are disparaging of the term “Podcast” prefer to call them audio blogs (Web + log = blog), or video blogs (or “vlogs”). However, we’re going to stick with the term “Podcasting” for the remainder of this series. Chances are that people will be far more likely to know what you’re talking about if you say “I launched my own Podcast” versus “I started my own audio blog” unless you’re in the inner circle of mega-geeks who eschew anything which smacks of populist branding or consumerism. Ironically, many of the original pundits who became semi-famous for their blogs have left the blogosphere now that blogs are considered mainstream.

It is advisable that before considering creating your own Podcasts, that you first explore a little bit what is already out there, and how others are doing it, to get a better sense of not only what is possible, but also perhaps how you might do something better (see Chapter 2, part three of this series, for Podcast Business Plan tips).

If you’re new to the world of Podcasts, the next section will show you how to locate and listen to Podcasts on your PC.

Podcatching 101
While “Podcatcher” sounds like somebody from a crack team of government agents trying to track down pod people from Invasion of the Body Snatchers, in actuality Podcatching refers to a software application which is capable of subscribing to and playing a Podcast.

For instance, Apple’s iTunes software, when running on a PC, is a Podcatcher because you can subscribe to programs, and listen to them on your computer (see Figure 1-2). What makes iTunes so “insanely great” (to quote Apple’s founders) is that it is also a superb directory of programming, both free and fee-based, especially if you’re an iPod owner. And, unlike the majority of other Podcatchers it handily plays video “inline” without needing to launch external video players.

If you’re not already using iTunes, it’s easy to get, and if you don’t want to use iTunes there are a huge number of Podcast directories you can explore simply by pointing your Web browser at a URL (see Appendix in the final episodes of this series for a listing of such directories).

To get the free iTunes software, simply go to www.iTunes.com and follow the directions found there for your particular operating system. Of course, if you own an iPod, you’re certain to already be using iTunes.

To find Podcasts in the iTunes Music Store, simply click the Music Store link found in the left menu in iTunes. Then, in the “Inside the Music Store” menu, find the text link that says “Podcasts.” (The layout in the store does change from time to time, so you might need to look at the menus on the left or right side of the store to find it.)

Once you’re in the Podcast directory (Figure 1-2), you can use the various navigation elements to browse by topic, new and notable, Today’s Top Podcasts (right side of screen), or other options like fan favorites (again, this section of the iTunes Music Store changes frequently and may differ today from this screen shot). There is also a search box on the left side where you can do searches for topics you’re interested in. For example, try doing a search for “music” with the choice “Search Podcast Titles.” This will bring you to a search result page for Podcasts with the word music in their title.

Figure 1-2 © Simmons
Figure 1-2: Apple’s iTunes Music Store is an example of a Podcatcher, as well as a Podcast directory.

You’ll find this can be a lot of fun, real quick. For example, I’m a big fan of musician Joe Satriani, and while writing this article series (originally a book project) I ran across his Podcast on iTunes promoting his new album “Super Colossal.” Instead of just doing a weekly or periodic rant about rebuilding his garage or the new car he was thinking of buying (you will find celebrity Podcasts of this nature, sadly), he created a program where each episode he talked about the inspiration and production of each song on his new album. This allowed fans (like me) to get a taste of the thinking behind the new album and where his head was at while making each song, with a taste of each track. I was able to watch the clips and listen to the music while working out on the elliptical machine at the gym thanks to the video capabilities of my iPod.

Juicy Podcatching
It would be rude not to mention the grandpa of Podcatchers, iPodder (which is now called “Juice Receiver”), created by the folks who brought the term Podcast into the public sphere. Developed by former MTV “veejay” Adam Curry and his pals, iPodder was what brought the concept to many of us who got our feet wet before the media knew what we were doing.

Today, Juice Receiver (see Figure 1-3) is available for Windows, Mac, and Linux and the lead programmers are Erik de Jonge, Andrew Grumet, and Garth T. Kidd; with the interface design by Martijn Venrooy. Since the program is free, you are encouraged to use the “donate” option on the Juice site if you end up making the program your primary source of enjoying and catching Podcasts.

This application contains the pedigree of iPodder, but has been updated to be more user-friendly for the average person, and now spotlights the numerous popular directories of program content. Once installed on your computer, Juice allows you to subscribe to programs found online or from within its built-in search features, and then download them to your computer and/or portable media device.

Figure 1-3 (c) Simmons
Figure 1-3: Juice Receiver is the latest iteration of the “original” Podcatcher.

Juice has a very simple interface, where there are tabs across the top, then windows below. On the “Subscriptions” page (see Figure 1-3), there are two boxes (or “panes” of the window), where the top box has a list of Podcasts you have subscribed to with the Location URL (URL = “Uniform Resource Locater” or Web address) of the feed file.

The bottom box shows the episodes of the program selected in the top box. Thanks to the uncluttered design, you can easily see the size of the program files, its episode title, and the URL where the audio/video file lives (which can be entirely different from the URL of the Podcast’s RSS “feed file”). I find the URL feature useful, since it helps to know that I’m not subscribing to a Podcast by singer Jason Mraz that then says it’s coming from someplace in Russia or Korea, which might be an indication it’s potentially some kind of “spyware.”

TIP: It’s wise to keep an eye on the URLs of Podcasts you subscribe to, to ensure you know where the content is coming from, since the content is going to be downloaded to your computer. Having a robust anti-virus program on your PC is a must. I’ve found Avast (www.Avast.com) to be the best choice overall for Windows XP, since it scans downloaded content, also has protection when visiting actual Websites, and does a full boot-scan of the system without launching Windows. If you’re ultra-paranoid, you might consider using iTunes for Podcatching, since the iTunes Music Directory system automatically checks submitted program feeds to ensure they actually work, which is not the case with many of the Podcast “directories” out there.

One of the technically impressive aspects to the program is that you can have it run in the background “listening” for new programs and downloading them to your PC while you work on other things and can be set to launch automatically when your computer starts up, where it can spring into action for you while you’re checking e-mail, newspaper sites, or your stock reports (see the TIP on this page for a caveat).

Another feature that makes Juice a step above some of the free Podcatchers out there is that it integrates a wide variety of Podcast directories within the program (see Figure 1-3) where you can search for content, automatically find categories of content, and even see specific show lists in a simple browsing mode. In some ways, this is actually easier to use than iTunes, albeit without all the fancy graphics and listener ratings and feedback.

Juice is also a great choice if you have a media player that is not compatible with Apple’s iTunes, such as a Windows Media Player device, or Sony music players (Sony added support for the iPod music format in Spring 2006, but the iTunes software only directly supports iPods). Or anything that uses memory cards (SD, Memory Stick, etc.). Juice allows you to get audio and video Podcasts and download them to your portable media device in the same way iTunes works with iPods. It cannot “purchase” programs through the iTunes store, but if you’re looking to listen to the bazillions (which is more than a hundred, but less than a trillion) of Podcasts out there that are free, or sponsored in some way, Juice is a terrific choice. If you have a Sony PSP, then you might look at the special software that Sony offers for about $20, specifically for getting both audio and video Podcasts into your PSP as simply as possible (it may even be free with a new PSP by the time you’re reading this).

To obtain the program you need to start at the open source home for the application, which is: http://juicereceiver.sourceforge.net/ (if this link does not work, start at www.iPodder.org then click link on right side to “Download iPodder”). Downloading the application is a little confusing, but is almost identical to downloading and installing Audacity (see Figure 3-7 in Chapter 3) and so won’t be illustrated here. If you are inexperienced at downloaded or installing software on your PC you should look at iTunes first.

Possibly one of the coolest things about Juice Receiver, from a marketing standpoint, is that for about $100, you can create a custom version of Juice (www.juicereceiverstore.com/) to post on your Website, which is pre-loaded with your Podcast feed(s) and includes your own logo (graphic of your company name) and main Website URL. This is a wonderful way to keep your brand in front of your audience, and can make it simple for those who want to hear your show but don’t want to spend a day getting an education on how to listen to your show. This is very highly recommended if you are launching a business or money-making Podcast hosted on your own Website, and particularly if you have multiple programs on different topics, with different hosts, or which you classify by “channels,” since the custom version of Juice would give your listeners just one download to be able to stay up to date with everything you do.

Like everything else that is Internet-related, these offerings may change over time, or be discontinued or seriously altered by the time you read this.

Podcatching in your Web Browser
If you happen to use the Firefox Web browser (www.mozilla.org) instead of Internet Explorer to surf the Internet on a Windows XP machine, you can get a very nice extension called “Wizz RSS News Reader” by Mike Kroger that allows you to subscribe to and enjoy Podcasts. If you look at Figure 1-4, you’ll see the three windows at left, where programs are listed in top box, episodes of a selected show in the middle, and information about a selected episode in bottom box. In this image you can see my site Send2Press.com, where I have just subscribed to the program using Firefox, simply by dragging the orange XML logo onto the top left box. The plug-in is free, but the plug-in may direct you to the author’s site in the Web window from time to time. You can find this and other News Reader extensions at the Mozilla Website; you can install an extension, try it, and if you don’t like it simply disable it using the Tools function (see Help topics in Firefox).

Figure 1-4 (c) Simmons
Figure 1-4: The Wizz RSS News Reader extension running in the Firefox Web browser.

Microsoft is including “instant RSS feed” support in version 7 of Internet Explorer, which is being developed side-by-side with the new Windows Vista operating system for 2007. Although with Microsoft’s competitive stance toward Apple and vice versa, you might not actually find the term “Podcast” anywhere in the new versions of either Internet Explorer (also used by AOL) or Windows Vista.

If you own a “modern” OSX-based Apple Mac computer, your included software from Apple for Web browsing may support subscription to RSS feeds. In fact, Apple includes a wealth of tools like the Safari browser, iLife, iTunes, and .Mac, many of which can be used to subscribe to and even create and host a Podcast.

Getting it On-Demand
Most Podcasts are also available to listen to “on demand” when the Podcast is located on a dedicated Website. For example, for my own entertainment Podcast, I allow people to view a menu of my shows, with photos and background information on guests, and visitors can choose to click links to listen to the shows in MP3, or RealAudio that “streams” from the server. The RealAudio version is 1/3 the size of the MP3 and is right on the edge of sounding poor, but is still very listenable if somebody has a really slow modem connection. This allows interested people to listen to a specific show without having to subscribe to the show, or use a Podcatcher in any way.

Ideally one should consider making a program available in multiple formats, such as MP3, RealAudio, and Windows Media. In some cases, the Windows Media version can end up being no better sounding at the same size as a well-produced MP3 file, which can be redundant (as on my own Website). On the other hand, future versions of Windows may inherently have some kind of preference for the Windows Media format, so if you have the space and bandwidth, it does not hurt to make the programs available in all possible formats.

See Chapter 4 for specifics on file formats, data compression and the “gotchas” related to program downloads.

TIP: If you are building (or have built) your own Website around your Podcast, it’s a good idea to consider building a portable Web (e.g., “WAP”) compatible version of your site, with simple navigation, that allows people using increasingly popular mobile Web applications on their cell-phone or PDA/Treo/Blackberry to easily view and click links for your programs by episode with different levels of compression (more compression means smaller file size, but poorer sound quality). A common way of doing this is by creating a sub-domain, such as wap.yoursite.com, and then identifying that URL to your prospective audience if they want to surf your program on their phone.

Finding Podcasts and Podcatchers
In addition to the software programs noted above, there are many other Podcatcher applications out there, including some which run on a Website for tracking programs and use a small player application you download, and others which don’t require you to download or install anything on your computer.

There are so many out there now, that you could spend an entire weekend sorting through all the options and possibilities. If you’d rather just get on with your life, then the programs mentioned above will get you going with the least possible suffering.

* For a list of Podcatcher applications and Podcast directories, see Appendix, which will be part of the final chapters of this series.

The Difference Between Internet Radio and Podcasts
What makes a Podcast different from Internet radio, or regular downloadable “on demand” audio files, is the wide acceptance of the RSS (Really Simple Syndication) file format. RSS is an offshoot of XML, which has transformed the way people can share and acquire information. RSS is similar to an HTML file used to create Web pages but with different “tags” that describe information and links to rich media files.

RSS adds the “subscription” component, enabling PC software and music devices to find new content by simply reloading the RSS file at specific times. So, if your software is “subscribed” to a specific RSS file (or “feed”) then each time that file is updated, your software sees that and acquires the latest content described and linked to in the RSS file (see Chapter 5 for example RSS files used for Podcasting). This software is often called a “Podcatcher” because it is catching the new content (Podcatchers are described in detail at the beginning of this chapter).

Because a Podcast is not live (being broadcast in real-time), but on-demand, it works the same way the Cable TV providers offer movies on-demand, where the movie is downloaded to the cable box then played back when asked for.

Podcasts are also different from Internet Radio in that Web-based radio is a point-to-point streaming method, that requires a software “port” (or “seat”) for the listener to “plug in” to (see Figure 1-5). Internet radio stations have a finite number of such ports and so if there are 1,000 ports, then the person attempting to plug-in (or connect) after 1,000 people are already connected, would not be able to do so. Or, another way to look at Web radio is that there are 1,000 “fixed” copies of the audio file that can be accessed at any one time. By having this “port” method, it allows for a single user or “seat” to view the file exclusively without interruption since nobody else is asking for that same copy. During playback the radio server is talking (or “hand-shaking”) with the PC that is connected to a port, to balance the playback based on the speed of the Internet connection so that you don’t hear gaps or interruptions (depending on what else you might be doing at the same time on your PC).

Figure 1-5 (c) Simmons
Figure 1-5: Illustration showing difference between Internet radio (left), which requires one port/seat per listener, and Podcasting (right), where any number of listeners can “subscribe” to a feed file that points at episodes of a program.

On-demand files are basically limitless, because each person who asks for it (or “demands” a copy) is just downloading the file data on the Web server to their own PC and because the server can “cache” the data in memory. Playback is handled on the PC of the person downloading it (or on an iPod) and is not “talking” to the server in real-time while the file plays back.

Of course, “limitless” really means up to the limit of what the Web server can handle and is sometimes directly limited by “throttling” which is the method Web hosting providers use to limit the amount of system resources used by any one domain on a shared server.

For very popular video content, like the Victoria’s Secret Fashion Show, a file network is used and provided by companies who are set-up for this, like Akamai (www.akamai.com). File networks use multiple servers to “scale” the number of streaming seats to the actual demand, so when 5,000 people want the file, there are resources to handle that, and if 50,000 people want the file at once, the system “scales up” to meet that demand. This is, of course, not inexpensive.

Normal “on-demand” files require you to ask for the file, hence the term. With Podcasting, you are subscribing to a single “feed file,” which then asks for any new content for that show without you having to ask for each new episode manually.

So, the upshot is that on the listener (or “client”) side, Podcasting is like an automated on-demand system; each time a new show is made, your Podcatcher will go get it for you. For the show producer, Podcasting on the “server” side is much more affordable to set-up, and requires no special “streaming” capability since it is not live content. See Chapter 6 for more information on issues related to Podcast Web hosting, and “gotchas” for managing Podcast content online.

Where Did Podcasting Come From?
The “invention” of Podcasting as a phenomenon is generally attributed in the media to former MTV “veejay” Adam Curry in 2004. However, many of us were doing regular online audio programs on our Websites (I had one in 1999, and was interviewed on another in Aug. 2000) which are identical to today’s “Podcasts” except without the subscription model facilitated by RSS.

In actuality, Curry created a software application called iPodder, to work with RSS “feeds” created by Dave Winer for some interviews that had been posted online in MP3 format, and building on work by Userland Software (Radio Userland). Some historical Websites on this topic claim that Danny Gregory coined the term “Podcast” itself. But there was a lot of pre-existing work done by others related to Internet Radio and RSS, and so the exact date of creation is not so simple.

The early history of Podcasting and the mechanics involved in its evolution would require an entire book of its own and is better left to Web historians. This article series is focused on those of us more concerned with making a Podcast and getting it out to the ears and eyeballs of our potential audience.

In fact, even as this (originally a book, now an article series) is being written, Podcasting continues to evolve. Other terms such as Screencasting, Mobcasting, Mobicasting, Nanocasting, Businesscasting (allegedly coined by the author of this series), Microcasting, and iPodcasting have been used and even trademarked. After all, applying a subscription distribution model to audio or video content does not have to be related to an iPod in any way.

Since you don’t technically need an iPod to create or listen to (or watch) a Podcast, it’s not unreasonable to assume the terminology may change over time and a future version of this series may not even contain the word “Podcast” as it is used today. On the other hand, Podcasting might become the default term for any audio or video subscription content in the some way that trademarked brands like Xerox and Kleenex have become generic terms for similar products produced by others.

However, for our purposes we’ll assume you are interested in learning more about Podcasting, and so let’s get started.


Continued in Chapter Two (Part Three in Series)
CHAPTER TWO: Outline of Producing a Show
* Getting Organized
* Overview of What’s Involved in Producing a Show
* Scripting a Show and Creating Guest Questions.


Copr. © 2005-2007 Christopher Laird Simmons – all rights reserved. This article series, including text and images, charts, and glossary, is protected under U.S. and international copyright law – unauthorized reproduction or republication, online or offline, in whole or part without express written permission of the author is strictly prohibited. Content originally intended for book, “The Savvy Guide to Podcasting,” but also appeared on MusicIndustryNewswire.com.